Showing posts with label Whole Wheat. Show all posts

Friday, September 25, 2015

POTATO ALE BREAD - MADE WITH A BOOZY MASH-FED STARTER

Hier geht's zur deutschen Version dieses Posts (folgt noch)


In 2007, after baking my way through all my old German bread baking books and Peter Reinhart's "The Bread Baker's Apprentice", I checked for more bread formulas in the internet.

In German food magazine Essen & Trinken, one recipe, featuring beer - always a plus! - caught my eye and piqued my interest. The beer was not only used to hydrate and flavor the dough, but, also, cooked into a mash, to feed the starter!

At that time I had the opportunity to chat with Peter Reinhart in an online bread baking Q & A, hosted by "Fine Cooking", and asked him about the boozy, mash-fed starter. He had never heard of such a thing, either.

Not only that - there was another oddity: the recipe described stretching and folding the dough into a neat package, at one hour intervals. What an entirely weird concept! I was puzzled and very intrigued. (Later I found out that S & F as a technique was first mentioned in The Fresh Loaf in 2006. Reinhart's "Artisan Bread Every Day", introducing a larger audience to S & F, was published in 2009).

Stretching and folding a dough - to me (in 2007) a totally alien concept!

A bit skeptical how this could work, I went ahead with the Englisches Kartoffelbrot mit Ale (English Potato Bread with Ale), stretching and folding the dough as per instruction, and was a bit surprised when I saw how the dough became smoother, more elastic, and really showed little gas bubbles, when I cut it to check the development.

My first trial resulted in a very nice tasting bread. But I wasn't quite satisfied with the rather thick and chewy crust. My scoring could have been better, and I didn't think making two long bâtards was the best way to shape it, either.

My first trial - great taste but thick, chewy crust

Over the years, I now and then went back to the curious Potato Ale Bread, adding a soaker to soften the whole wheat, raising the oven temperature in the beginning, and using steam to achieve a thin, crisp crust.

We really like this bread, it is one of the standards I make for myself. My thanks to Flor, the user who posted the original formula, for introducing me to S&F (Stretch & Fold), and a starter that likes ale - same as the baker!


POTATO ALE BREAD (adapted from Flor's Englisches Kartoffelbrot mit Ale)

Potato
150 g potato, unpeeled (if the skin isn't too thick)
water for cooking (reserve 225 g for dough)

Soaker
250 g whole wheat flour
50 g bread flour
4 g salt
225 g potato cooking water, at room temperature (70ºF/21ºC)

Ale Mash
125 g ale
25 g whole wheat flour

Starter
all ale mash (lukewarm)
50 g whole wheat mother starter (or what kind of starter you have at hand)

Final Dough
all starter
all soaker
150 g cooked potato
200 g bread flour
9 g salt

Mash cooked potato or cut it in small cubes

DAY 1
Cook potato in water until soft. Measure 225 g of the potato water, and set aside to cool to room temperature. Mash, or cut potato in small pieces, place in small bowl, cover, and refrigerate until using.

For the soaker, mix all ingredients in small bowl, cover, and leave at room temperature overnight.

Cook ale/wheat mixture until it thickens to a cream

For the mash, stir together ale and flour in medium sauce pan until well combined. Heat mixture to 167ºF/75ºC, stirring constantly, until it thickens to a cream. Transfer mash to a medium bowl, cover, and let cool until only lukewarm.

Stir mother starter into cooled ale mash until well combined. Cover, and ferment at room temperature overnight.

Mix mother starter with lukewarm ale mash

DAY 2
Mix final dough ingredients at low speed until all flour is hydrated, 1-2 minutes. Let rest for 10 minutes, then knead at medium-low speed for another 4 minutes. Dough will be very soft and sticky.

Transfer dough to lightly oiled work surface. With oiled hands, pat dough into a rough square, fold from top to bottom like a business letter in thirds, then do the same from the left and right sides (S&F). Gather dough package into a ball, and place, seam side down, in a lightly oiled bowl. Cover with plastic wrap.

Bulk ferment for 4-5 hours, with 4 more S&F at 1 hour intervals. It should have grown at least 1 1/2 times its original size.

Shape dough into a bâtard or boule, and place in floured banneton, seam side up, or down (if you prefer rustic, irregular cracks).

Proof at room temperature for 2-3 hours, until bread has almost doubled in volume (Finger poke test: a dimple should fill a little bit, but stay visible).

Preheat oven to 482ºF/250ºC, including steam pan and baking stone.

Rustic cracks appear when you proof the loaf seam side down

Transfer bread to parchment lined baking sheet (or bake directly on baking stone). Score bread (if smooth side is up).

Place bread in oven, pouring 1 cup of boiling water in steam pan. Bake for 10 minutes, remove steam pan and rotate bread 180 degrees for even browning. Reduce temperature to 375ºF/190ºC, and continue baking for another 30 minutes, until loaf is golden brown, and registers 200ºF/93ºC on an instant read thermometer.

Let bread cool on a wire rack.

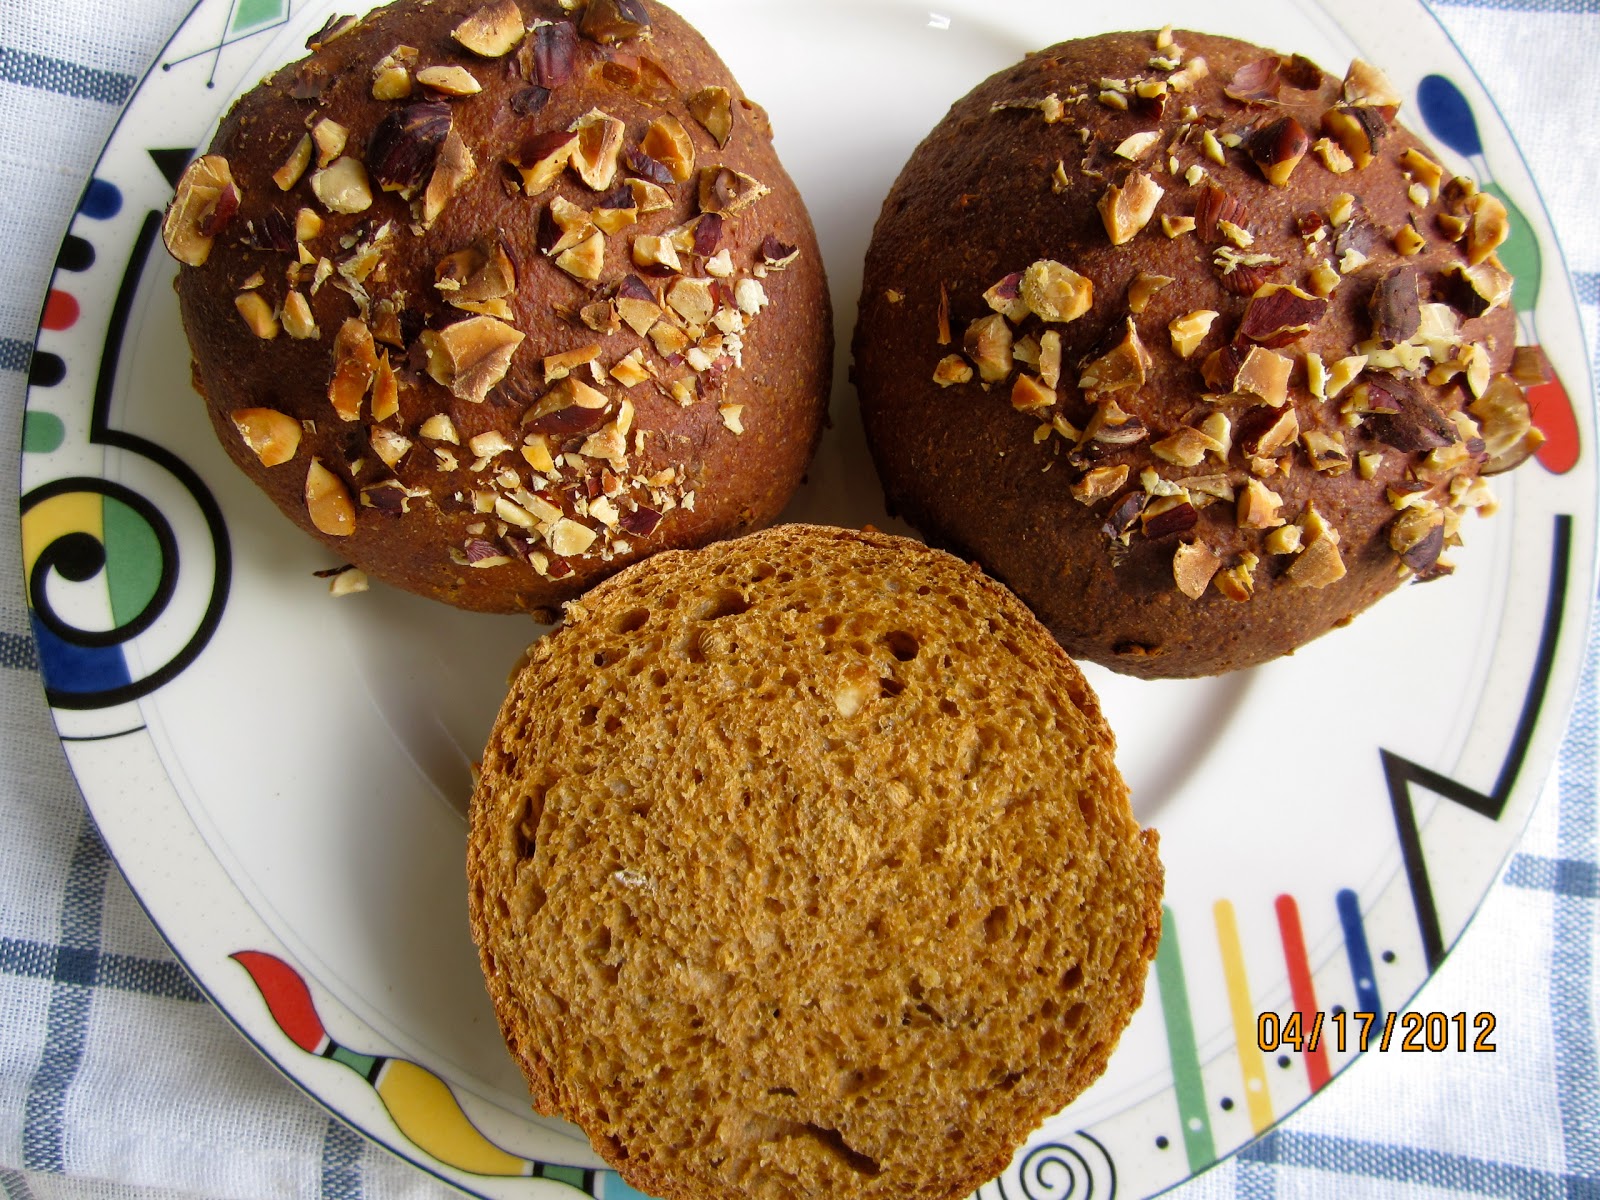
Moist and tasty - you can't go wrong with ale!

BreadStorm users (also of the free version) can download the formula:

Saturday, April 5, 2014

100% WHOLE WHEAT CINNAMON SWIRL BREAD


Hier geht's zur deutschen Version dieses Posts


Our ABC April project came just in time to alleviate a bout of winter blues. While my mother in Hamburg told me about blooming forsythias and crocuses, we hunkered down for yet another blizzard.

Usually not the greatest fan of sweet breads, I even might have skipped Hanaâ's pick, 100% Whole Wheat Cinnamon Swirl Bread, but there is something warm and soothing about cinnamon, and, looking at the snow outside, it was:

TIME FOR COMFORT FOOD!

Looking out into our snowy garden
King Arthur's original recipe uses a few tricks to temper the somewhat harsh taste of 100% whole wheat: a small preferment, and orange juice.

I know that whole wheat mellows considerably by long fermentation, but with only a quarter of the flour in the starter, most of the wheat didn't have time to undergo this softening.

And would half a cup of orange juice (though it would add a nice flavor,) really be able to fix the problem?

Using milder white whole wheat was an option, but I had plenty of regular whole wheat in my pantry, so that was my obvious choice.

I decided to give the whole procedure a makeover, working with my preferred stretch and fold (plus overnight rest in the fridge,) to allow for a longer fermentation and mellowing of the wheat.

With this method I could also safely reduce the amount of yeast. What I didn't cut down on was the sugar - 100% whole wheat needs the full dose.

One more finishing touch: I thought the sweet, cinnamon infused bread could benefit from having a little nutty bite, so I added some walnuts.

And the result? The bread was wonderful! Wheaten goodness without a hint of harsh or "too healthy" taste, pleasantly sweet and cinnamon-y. Just what the doctor prescribes for late winter blues.


  BreadStorm-Users (including the free version) can download the formula here 

Wheaten goodness, mellow and cinnamon-y

100% WHOLE WHEAT CINNAMON SWIRL BREAD  (adapted from King Arthur Flour)

Dough
28 g/1 oz/1/4 cup nonfat dry milk
46 g/1 5/8 oz/1/4 cup potato flour (or 1/2 cup instant mashed potato flakes)
425 g/15 oz/3 3/4 cups whole wheat flour
6 g/0.2 oz instant yeast
113 g/4 oz/1/2 cup lukewarm water
113 g/4 oz/1/2 cup lukewarm milk
113 g/4 oz/1/2 cup orange juice
71 g/2 1/2 oz/5 tbsp. melted butter
9 g/0.3 oz/1 1/2 tsp. salt
35 g/1 1/4 oz/3 tbsp. sugar
85 g/3 oz walnuts, coarsely chopped

Filling
1 egg, beaten (for brushing the filling and shaped loaf)
67 g/2.4 oz/1/3 cup sugar
7 g/0.2 oz/2 tsp. cinnamon
11 g/0.4 oz/1 tbsp. all-purpose flour
sugar in the raw (for sprinkling)

DAY 1
Stir all dough ingredients on low speed for 1 - 2 minutes (or with a wooden spoon) until all flour is hydrated and a shaggy mass forms. Dough will be sticky. Let it rest for 5 minutes.

Knead on medium-low speed for 6 minutes (or by hand). Dough should still be somewhat sticky.

Transfer dough to a lightly oiled work surface. With wet or oiled hands, stretch and fold (S&F) 4 times at 10 minute intervals (see here how this is done), stretching only as far as the dough allows, don't tear at it.

After the last fold, place dough in an oiled container with lid, and refrigerate overnight.

Dough waiting for the next S&F

DAY 2
Remove dough from refrigerator at least 2 hours before using. It should have grown about 1 1/2 times its original size.

Cinnamon filling

For the cinnamon filling: whisk together sugar, cinnamon and flour in a small bowl.

My dough was quite elastic and easy to roll out

Transfer dough to a lightly oiled work surface (or use a lightly floured silicone mat). Roll into a long, thin rectangle, about 16" x 9" (40 x 23 cm).

Brush dough with egg and sprinkle with cinnamon filling

Brush dough first with egg, then sprinkle evenly with filling.

Beginning with a short side, gently roll the dough into a log. Pinch seam and ends closed. Gently shape it into a smooth 9" (23 cm) cylinder, and place it in lightly greased 9" x 5"(23 x 13 cm) loaf pan.

Brush the loaf with some of the leftover egg and sprinkle with raw sugar

Brush loaf with leftover egg, and sprinkle with raw sugar. Cover, and let it rise until it has grown over the rim of pan by about 3/4"/2 cm, about 90 minutes, and stays dimpled when gently poked with a finger. (Don't forget to preheat your oven).

The loaf has grown about 1 1/2 times its original size

Preheat the oven to 350°F/175ºC.

Bake bread for 10 minutes. Lightly tent it with aluminum foil, and bake for an additional 45 - 50 minutes (check the browning - I removed the foil during the last 10 minutes.) It should be dark golden brown and register 190°F/88ºC on a instant thermometer.

Turn loaf out onto a wire rack to cool.

Stored in a paper bag, the bread keeps 3 days fresh. It also freezes well.


Not a hint of spring  - even Ruffi the Ruffian feels the blues

If you would like to join the Avid Bakers and take part in the monthly challenge, check here. New members are always welcome!

Submitted to Yeast Spotting
and Panissimo:  Bread & Companatico                                       
                           Indovina chi viene a cena 


Sunday, May 26, 2013

WILD RICE SOURDOUGH - THE BREAD THAT ENDED THE COLD WAR

Hier geht's zur deutschen Version dieses Posts


If you know the facebook group "Baking 101", you might also know Danny Klecko's blog "Last American Baker". Klecko's posts are whimsical and often very funny, and he seems to snort them out joyfully and without any effort (unlike one envious baker whose name I will not disclose).

 Now and then he puts a recipe in one of them, as a "teaser", to lure you into his world, even when you think you already overdosed on facebook. This happened to me when I followed the link with the intriguing headline: "The Recipe That Ended The Cold War".

Klecko describes how 20 years ago presidents Reagan and Gorbachev held a peace summit in St. Paul, his city. And the bakery, where Klecko worked at the time, was formally requested to supply a bread that the two heads of states could break, as a symbol of peace.

The job went to Klecko, to create a loaf that would please a Russian while being quintessentially Minnesotan/American.

After sweating plenty of blood and tears, and many prayers to his "Polish Jesus", this was what he came up with:

Danny Klecko's Wild Rice Sourdough  (3 loaves)

2 1/2 tablespoon yeast
2 3/4 cups water
1 1/3 cup brick starter (this refers to a mysterious Polish contraption, made of rye, bread flour and potato flakes)
1 tablespoon molasses
1/4 cup honey
2 tablespoon vinegar
2 1/4 wheat flour
6 cups bread flour
1/2 cup bran
1 tablespoon salt
1 cup cooked wild rice

So far so good. But now it comes:

Bake at 400-450º F for close to 30 minutes.

Quite a temperature range! Klecko's comment: he would like a crustier bread, baked at 450ºF, but many home bakers might prefer 400ºF.

I asked Klecko about the low amount of salt. He admitted to having "moved the salt content around a bit to pacify cry baby Americans that wouldn't eat the bread because they felt the salt content was too high."

Wild rice, expensive, but very tasty

So I set out to metrically "remaster" the recipe, figuring out the starter, and calculating the amount of uncooked wild rice that would yield 1 cup of cooked rice with as little leftover as possible.

Since the technique should include my preferred overnight fermentation, I found that I could safely reduce the amount of additional instant yeast.

Here is my version of this historically important bread, (down-scaled to 2 loaves:)


WILD RICE SOURDOUGH   (2 loaves)  (adapted from Danny Klecko's "Last American Baker")

STARTER
43 g rye sourdough starter (100% hydration)
53 g rye flour
74 g bread flour
80 g water

RICE
144 g water (for cooking, don't discard any remaining liquid after cooking, add to dough)
  37 g wild rice, rinsed and drained

DOUGH
440 g water (95 F )
   2 g instant yeast
all starter
all cooked wild rice (including any remaining water)
500 g bread flour
192 g whole wheat flour
  20 g wheat bran
  16 g salt
  26 g balsamic vinegar
  13 g molasses
  13 g honey (optional, if you like it sweeter)


1.DAY :
In the morning, mix all starter ingredients at low speed (or with wooden spoon), until all flour is hydrated (1-2 minutes). Knead 2 minutes at medium-low speed (or by hand), let rest for 5 minutes, then resume kneading for another minute. Cover, and leave at room temperature.

After cooking the rice absorbs more water while it cools

In a small pan, bring wild rice with water to a boil, reduce heat to low, and cook, covered, for 45 minutes. Leave at room temperature, the rice will absorb most of the water.

In the evening, prepare final dough. Dissolve instant yeast in warm water. Add to all other ingredients in mixing bowl. Mix at low speed for 1 - 2 minutes (or with wooden spoon), until all flour is hydrated. Let rest for 5 minutes.

Sourdough, ready for action!

Resume kneading at medium-low speed (or by hand) for 2 minutes, adjusting with more water, if really needed (dough should still be sticky). Knead for another 4 minutes. Dough should still be somewhat sticky.

Transfer dough to lightly oiled work surface. With oiled hands, stretch and pat dough into a rough square and fold it like a business letter in thirds. Gather into a ball and place it, rough side down, into a lightly oiled bowl. Cover, and leave to 10 minutes.

After the last fold, the dough goes in the refrigerator

Repeat this stretching and folding 3 times, with 10 minute intervals. After the last fold, place dough in lightly oiled container (I divide it at this point in two equal portions,) cover, and refrigerate it overnight.


DAY 2:
Remove dough from refrigerator 2 hours before using, to warm up.

Overnight the dough has almost doubled

Preheat oven to 450ºF/232ºC, including steam pan and baking stone.

Transfer dough to a lightly floured work surface. Shape dough into 2 boules or bâtards and place them, seam side up, in bannetons. Proof for 45 - 60 minutes, or until they have grown 1 1/2 times their original size (Finger poke test!).

The bread has grown 1 1/2 times its original size

Transfer breads to parchment lined baking sheet (or bake directly on baking stone.) Score them crosswise.

Crosswise slashes give the breads a nice pattern

Bake breads for 20 minutes, steaming with 1 cup boiling water. Remove steam pan, rotate loaves 180 degrees, and continue baking for another 20 - 25 minutes. They should sound hollow when thumped on the bottom, and register at least 200º F/93ºC (instant thermometer.) Leave them in switched-off oven with door slightly ajar for 10 more minutes.

Remove breads from oven, and let them to cool on wire rack.

The wild rice gives it a nice speckled crumb


Like Reagan and Gorbachev, we would have been willing to end the war, ANY war, hot or cold, after tasting this wonderful bread. Slightly nutty and very moist, and, with the wild rice speckling the crumb, beautiful to behold.

So we might all thank Danny Klecko for the recipe that brought the Berlin Wall tumbling down. The Wild Rice Sourdough put Reagan and Gorbi in such a mellow mood that they couldn't help but ending the Cold War!

(Completely updated version, originally posted 2011)

Submitted to YeastSpotting

Submitted to Panissimo:  Bread & Companatico
                                           Indovina chi viene a cena                                            


Thursday, September 13, 2012

LEINSAMENBROT - GERMAN FLAXSEED BREAD

Hier geht's zur deutschen Version dieses Posts.


German breads are often made with a combination of three or more flours, and loaves with grains and seeds are, also, very popular.  Flaxseed breads are, therefore, one of the regulars in German bakery shelves.

My Leinsamenbrot, made with bread flour, rye and whole wheat, is a hearty bread with a pleasantly nutty taste and little crunch from the seeds.

Though whole flax seeds, even when thoroughly soaked, do not release much of their nutrients into our digestive system, the little brown specks give the bread an attractive look - and the fiber supports (to put it elegantly) bowel movement.

Like most German everyday breads, Leinsamenbrot makes good sandwiches with ham, salami or cheese, but tastes also good with jam or honey.

Different from Americans, Germans eat their sandwiches mostly open faced - only if they take it to work or school the cold cuts will be covered by a second slice of bread.

I adapted this recipe from one of my old German bread baking books,"Brot backen" by Cornelia Zingerling.

It contains a lot of good recipes, though I "remastered" the techniques to more modern methods, utilizing pre-doughs and autolyse, as well as cold fermentation.

Leinsamenbrot is made with a soaker and biga. I like mixing the dough the day before and let it rise slowly overnight in the fridge.

This kills two birds with one stone, I don't have to wait for the rise, and I don't need to get up too early on baking day.

The heavy lifting being all done, I only take the dough out of the fridge 2 hours earlier to de-chill, and shape, proof and bake the breads.

But you can also prepare the biga in the evening, and the final dough on baking day, but the soaker should be mixed 24 hours earlier, so that the flax seeds have time enough to soften and absorb all the water they need.

To achieve the pretty star pattern, you need a large, star shaped cookie cutter.


Scored with a smaller cookie cutter
LEINSAMENBROT - GERMAN FLAXSEED BREAD    (2 Loaves)

SOAKER
200 g whole rye flour
111 g whole wheat flour
5 g/1/2 tsp. salt
150 g whole flaxseeds
273 g buttermilk
33 g water


BIGA
311 g bread flour
1 g/1/4 tsp. instant yeast
203 g water

FINAL DOUGH
all soaker and biga
78 g bread flour
  7 g salt
  7 g instant yeast (2 1/4 tsp)
19 g/1 tbsp. honey
15 g/1 tbsp. pumpkin seed oil (or other vegetable oil)
    milk, for brushing


DAY 1
In the morning, stir together all soaker ingredients until well hydrated. Cover with plastic wrap, and leave at room temperature. (Soaker will become pretty stiff).

Mix together all biga ingredients at low speed (or with wooden spoon) for 1 - 2 minutes, until all flour is hydrated. Knead for 2 minutes at medium-low speed (or by hand).

Let dough rest for 5 minutes, then knead for 1 more minute. Place biga in lightly oiled bowl, turn around to coat with oil, cover with plastic wrap and refrigerate (up to 3 days). Remove 2 hours before using, to warm up.

In the evening, mix together ingredients for final dough for 1 - 2 minutes on low speed, or by hand, until dough comes together. Knead for 4 minutes on medium-low speed. Dough should be slightly sticky, adjust with a bit more water as needed.

Let dough rest for 5 minutes, then resume kneading for another minute. Place dough in lightly oiled container, turn around to coat with oil. Cover, and refrigerate overnight. (I divide the dough at this point already into 2 portions and refrigerate them in 2 containers.)

The dough has risen overnight in the fridge
DAY 2
Remove dough from refrigerator 2 hours before using, to let it come to room temperature.

Shape dough into 2 boules, and place them, seam side down, on a parchment lined baking sheet. Brush with milk. Score them with a big star shaped cookie cutter. Spray breads with baking spray, and cover them with plastic wrap. (To learn how to shape your bread into a boule, click here.)

Shaped (and cookie cutter scored) boules on baking sheet


Preheat oven to 425º F, including baking stone and steam pan. (To learn how to prepare your home oven for hearth baking, click here.)

Let breads rise at room temperature for 45 - 60 minutes, or until they have grown to 1 1/2 times their original size. (Poke test: gently poke dough to make an indentation, it may slowly come back a bit, but should stay visible.)

Bake breads at 350ºF, steaming with 1 cup of boiling water. After 20 minutes, rotate breads 180 degrees, remove steam pan, and continue baking for another 20 - 25 minutes.

They should be a deep golden brown, sound hollow, when knocked on bottom, and register at least 195ºF (instant thermometer).

Let breads cool on wire rack.

Breads at Hamfelder Hofladen, a farm bakery near Hamburg


Submitted to YeastSpotting and BYOB

Monday, August 13, 2012

DAN LEPARD'S ALEHOUSE ROLLS


Hier geht's zur deutschen Version dieses Posts


When I was a student, I traveled with my best friend, Andrea, through England, Cornwall and Wales. We didn't have a fixed itinerary, we just followed our nose to places we had read or heard about.

We didn't stay in hotels (only once, and that was as dusty as it was expensive), we preferred B&Bs, always looking for interesting old buildings. We slept in grand manor houses, rustic inns, cozy farm houses, and even a water mill from the sixteenth century.

Old Water Mill Inn & Pub, England 1971
People always complain about the English food - I never had a really bad experience, I would always find something I liked, as long as it started with "apple" and ended with "pie"!

We often ate in pubs, having sandwiches with cheddar and chutney, and I was delighted to try the different beers.

With all these fond memories in mind - no wonder I wanted to try master baker Dan Lepard's Alehouse Rolls. You will find it in his book "Short and Sweet", or here.

I had just bought Newcastle Brown Ale at the Bangor commissary, and thought this was very appropriate for British rolls.

The dough is made with a hot beer soaker - ale and oats are brought to a boil, with butter and honey added to the hot liquid - and the rolled oats are toasted.

It also has some whole grain flour, to make the rolls even heartier (and give health conscious bakers a better conscience!)

Hot soaker with ale, oats, butter and hone
Dan Lepard has a nice, minimalistic approach to working the dough, he handles it gently, kneads it very briefly, and allows it to develop while resting (autolyse).

As a psychotherapist this method appeals to me a lot: give the patient dough the means and time to develop, without pushing and hectoring - and it will grow just fine!

At different times I had to add varying amounts of water to the final dough, the consistency should be soft and somewhat sticky.

Instead of letting the dough rest for a final 30 minutes on the counter, I did what I usually do - and put it to sleep overnight in the fridge.

This cold fermentation of the dough fits much better in my schedule than doing it all on one day. Though I like baking in the morning, I don't want to get up in the wee hours, so I prepare everything the day before, and only have the shaping and baking left to do.

Having to choose between large sandwich rolls (à 235 g a piece) or smaller dinner rolls, I opted for the more petite version - 12 rolls à 92 g.

The recipe suggests rolling the rolls first over wet kitchen paper towels and then in oat flakes. I didn't read the instructions thoroughly, and, therefore, dunked only the tops in the oat meal.

Alehouse Rolls - ready for baking

Whereas the giant sandwich rolls have to bake for 20 minutes at 210º C/410º F, and then some more at reduced heat, my little rolls were golden brown after 26 minutes (without reducing the heat.)

They tasted just as good as they looked, a semi-soft crust with a little crunch, and a hearty, somewhat nutty flavor.

I have made these rolls with rye flour and brown ale, whole wheat and stout, as well as spelt flour and a rather hoppy ale. All versions tasted excellent, spicy and slightly sweetish.


ALEHOUSE ROLLS  (adapted from Dan Lepard)
(12 Rolls)

75 g rolled oats
440 ml ale or stout
25 g butter
25 g honey
450 g bread flour
100 g rye, whole wheat, or spelt flour
6 g instant yeast
8 g salt
20 g cold water, or more, as needed (I used up to 80 g)
rolled oats, for topping

DAY 1
Toast oats in oven at 400ºF/200ºC for ca. 7-10 minutes, stirring in between, until they turn a rich golden brown (or toast them in a dry skillet on the stove top.)

In a saucepan, bring beer and toasted oats to a boil over medium heat. Remove pan from the heat, add butter and honey, stir until melted, cover, and let cool for ca. 30 minutes.

Mix flours, yeast and salt together in large bowl. Add lukewarm oat mixture and stir with your fingers, adding a little cold water if needed to make a soft, somewhat sticky dough (hand mixing gives you a better feeling for how much extra water you should add). Cover bowl and leave for 10 minutes.

Transfer dough to lightly oiled work surface, and, with oiled hands, gently knead it for 10 seconds. Scoop dough back into bowl, cover, then repeat the light knead 2 x more at 10-minute intervals. Place dough in oiled container, cover and refrigerate it overnight. (At this point I divide the dough into 2 portions).

Alehouse Roll dough after bulk rise - ready to be shaped


DAY 2
Transfer dough to lightly floured work surface. Divide it into 12 pieces. Shape into rolls.

Place sheet of wet paper kitchen towel on one dinner plate, and rolled oats on another, then roll each roll first across wet paper and then through oats. Place on parchment lined or perforated baking sheet, cover, and let rise for 45 - 60 minutes, or until they have grown by 1 1/2 times their original size.

Preheat oven to 210°C/410°F. (Steam optional.)

Bake the rolls for 12 minutes, rotate, (remove steam pan if using) and continue baking for another 13 minutes, until golden brown.

Post updated 9/6/14 to include formula and BreadStorm downloadable file.


As tasty as they look - freshly baked Alehouse Rolls.

Sunday, July 15, 2012

MULTIGRAIN PITAS - TASTY POCKETS


Multigrain Pitas and Pains a l'Ancienne - I bake them every week

You can find an updated and completely re-written version of this post here.


"Can you bake pitas, too?" Kathryn, the lovely owner of A&B Naturals, asked me one day. Their usual supplier wasn't available anymore. I had never made them, so I said with conviction: "Yes!"

At least I knew where I could find a pita recipe!

In "Whole Grain Breads", one of my favorite baking books, Peter Reinhart has a recipe for whole wheat pitas. And whole grains are just what my customers at A&B prefer.

I started my first pita dough. No big deal, until I got to the shaping part. The pitas had to be rolled out  no thinner than 1/4 inch (6 mm), and to an 8-inch (20 cm) diameter. But my pitas already reached this thickness at 6 1/2 to 7 inches (16 to 18 cm.)

A high oven temperature is key to a pita's proper horizontal separation into two layers. This high temperature has to be maintained during the whole bake, from below as well as from above.

Many cheaper ovens don't heat up to the necessary 550ºF (280ºC.) Without that boost pitas can't produce the large gas bubble that creates a pocket. And without a pocket - no delicious filling!

A baking stone, or a rack lined with unglazed terracotta tiles (like I have), works best for keeping the  temperature stable, even when the oven door has to be opened several time during the baking process. And very hot stones make the best baking surface for pitas, too.

To reheat fast enough after each opening of the door I remembered Peter Reinhart's advice for baking pizza ("American Pie"), where the problem is the same: intermittently switching the oven to broil for a short time.

How many pitas can you bake at the same time? One batch of dough makes 8 (or 6, if you want larger ones.) Peter Reinhart says one at a time, but, of course, being a semi-professional this time consuming process didn't appeal to me too much.

After some trials, I found that I can put two at the same time in the oven. That's the maximum, with more it becomes very difficult to get them in and out of the oven without damage, and to keep control over their baking process.

One or two pitas can be baked at the same time
Of course, it takes a little bit of experience to slide the pitas into the oven without them folding over in one place, and to extricate them without nicking them with the paddle.

But it's not rocket science, a smart child can do it: Little Josh, our carpenter's son, thought it more fun to help with baking than reading his book!

Josh has good reason to be proud!
Slow fermentation gives this pita its excellent taste. It also softens the 7-grain mixture I substitute for some of the whole wheat flour.

I add an overnight bulk rise in the fridge, this is more practical for my schedule and, in my opinion, also improves the taste even more.

Though I often reduce the sweetener in Peter Reinhart's recipes, this whole grain bread needs the full dose.

We like our pita filled with grilled Halloumi cheese, tomato and lettuce - the way we had it in Girne/Kyrenia on Cyprus.

And how do my customers at A&B Naturals like them? They fly off the shelf so that I have to bake them every week!


MULTIGRAIN PITA  (8)

Soaker
170 g whole wheat flour
  57 g multigrain mixture (mine is made with cracked rye, wheat, barley, corn and oats, flaxseed, and millet)
    4 g salt
170 g water

Biga
227 g whole wheat flour
    1 g instant yeast
170 g water

Final Dough
All soaker and biga  (cut in pieces, they blend easier into the dough)
113 g whole wheat flour
    5 g salt
    5 g instant yeast
  28 g honey or agave nectar
  14 g extra virgin olive oil

DAY 1:
In  the morning:
In a small bowl, stir together all soaker ingredients until everything is hydrated. Cover, and leave at room temperature.

Place all biga ingredients in mixer bowl. Mix at low speed for 1-2 minutes, until all flour is hydrated. (Or stir with wooden spoon) Knead at medium-low speed (or with hand) for 2 minutes. Let rest for 5 minutes, then resume kneading for another 1 minute.

Place biga in oiled bowl, turn around to coat with oil, cover, and place in refrigerator (remove 2 hours before using.)

Evening:
Mix all final dough ingredients at low speed (or with hand) for 1-2 minutes, until combined. Knead at medium-low speed (or with hand) for 4 minutes (dough should be a bit tacky, but not sticky. If necessary, adjust with a little extra water or flour.)

Let dough rest for 5 minutes, then knead for 1 more minute. Transfer to oiled container, turn around to coat with oil, cover and place in refrigerator overnight. (Dough can be shaped cold the next morning.)

BAKING DAY:
Preheat oven as high as possible, at least to 550ºF (280ºC). Place baking stone in the upper third of oven.

Divide dough in 8 equal pieces (ca. 120 g), shape into rounds and place, seam side down, on parchment lined baking sheet or tray. Cover, and let proof for 45-60 minutes until rolls have grown to 1 1/2 times their original size.

Transfer rounds to floured work surface. Dust them well with whole wheat flour. With a few strokes, roll each piece to a 4-inch (10 cm) disk, and put them on a pile.


After all rolls are rolled out, turn pile around, so that the first disk is on top. Re-roll out disks so that they are 1/4-inch (6 mm) thick, with a diameter of 6-1/4 to 7 inches (16 -18 cm). Place (separately) on baking sheet or tray, cover, and let rest for 15 minutes.


Switch oven to broil 5 minutes before baking, so that stone gets really hot. Sprinkle peel*) with a little flour (not much is needed since pitas are fairly dry.)

Place 1 or 2 pitas on peel, and slide them onto hot baking stone. Watch them through the oven window! They start building large bubbles, and puff up like a balloon after ca. 2 minutes. Now they need only 20 seconds more to be done (they should stay soft.) Remove them with peel, and let them cool on wire rack.

Repeat with remaining pitas, always waiting for the oven to reheat again (switch briefly to broil after taking one batch out, if this takes too long.)

*) A wooden peel works best for sliding pitas into oven, but a metal one works better to remove them quickly - it has a sharper edge.

Pitas deflate quickly, once they are out of the oven
 
To store:
Multigrain pitas keep fresh for several days in a plastic bag. Normally a taboo for every bread aficionado, this is necessary to keep them soft, and prevent them from drying out.

They also freeze well, individually wrapped in plastic foil, then placed in a ZipLock bag.

(This recipe is an adaptation of Whole Wheat Pitas from Peter Reinhart's "Whole Grain Breads".

Submitted to Yeast Spotting

Sunday, June 3, 2012

MUESLI ROLLS

Muesli Rolls
 Hier geht's zur deutschen Version dieses Posts


A while ago I admitted neglecting some of my baking books, never giving them a second look, while shamelessly favoring others.

To atone for my neglect, I pledged to give every book a fair chance with my "Equal Opportunity Baking" list, with one recipe from ALL of my baking books.

Published in 1997, I use "Brot und Kleingebäck" mainly as resource, adapting the old, labor intensive methods to more modern techniques that require less brawn and hands-on work, thanks to longer fermentation and refrigerator sleepovers.

Interesting recipes but old techniques
These little (or no)-knead methods, described by Peter Reinhart, Jim Lahey, and others, are much easier to work with. And not only that, they also improve the taste.

I started the evening before, kneading the dough, then let it slowly rise overnight in the fridge. The next morning I baked my rolls. When they came out of the oven, they looked - and smelled - very appetizing.

I couldn't wait to have my first bite, but what a disappointment - I found that "the proof was in the Muesli Rolls". They tasted good, yes, but were much too dry!

How could that happen? My dough had been well hydrated the night before, even a little bit sticky, as it should be with stretch-and-fold doughs.

I really liked the taste of the rolls, otherwise I would have written off the recipe with a scribbled comment: "not that great!" Therefore, I took on the recipe again to find out what had caused this lack of moisture.

Was it the different fat content of German "saure Sahne" and American sour cream (10% vs 12-16%?) Not likely: more fat will make the crumb softer, but not drier.

Saure Sahne or sour cream - here it didn't matter
American molasses instead of German sugar beet syrup? Nope! And my baking friend Paul only recommend adding more water, when I asked for his advice.

But there was one ingredient that had puzzled me from the beginning - the unspecified "hearty muesli mix". There are many muesli mixes on the market, and they differ in their composition from one brand to the other.

I looked at the list of ingredients on the package. Bob's Red Mill's "Old Country Style Muesli" had 5 different flakes, dates, raisins, flax seed, sunflower seeds, almonds, and walnuts.

The stretch-and-fold method doesn't require pre-doughs (except for sourdough breads, of course). Usually the whole grains and seeds have enough time to soak when they spend the night in the fridge.

But I find that pre-soaking coarser ingredients doesn't hurt. And whole flax seed I always soak for 24 hours, anyway - to make them better digestible.

This is the culprit!
Even though my dough seemed well hydrated after the stretch-and-fold procedure, those flakes, seeds and dried fruits had swallowed a lot of water overnight.

The original recipe mentions overnight refrigeration as a do-ahead option, too, but without the muesli mixture. That should be kneaded into the dough before baking.

With just 10 minutes (!) rising time for the shaped rolls, the flakes and dried fruits have no time to absorb much liquid, and the original recipe requires - except for the sour cream - only 5-6 tablespoons water!

But what to do? I like chewing on nuts, yes, but on hard pieces of dried fruit? No, thanks!

In a comment, the recipe suggests using a mixture of oatmeal, raisins and hazelnuts, instead of store bought muesli. And that's exactly what I did when I made the rolls again - to have better control over the hydration.

Since a ready muesli mixture also contains sugar, I added a bit of honey. These whole wheat rolls should be slightly sweet.

I hoped these tweaks would work, and I wasn't disappointed - the second batch of muesli rolls turned out just as nice as they looked!


MUESLI ROLLS  (10 - 12))

Soaker
65 g old fashioned rolled oats
20 g golden raisins
100 g water

Dough:
400 g whole wheat flour
185 g soaker (all)
250 g sour cream or Greek yogurt, lukewarm
12 g instant yeast
45 g/2 tbsp molasses
10 g honey (or more, to taste)
1 large egg
6 g salt
5 crushed coriander seeds
½ tsp ground cinnamon
20 g toasted hazelnuts, coarsely chopped
egg white, mixed with a bit water (for glazing)
20 g hazelnuts, finely chopped (for topping)

The homemade muesli mix worked!

DAY 1:
In the morning, stir together all soaker ingredients. Cover, and leave at room temperature.

In the evening, mix together with all dough ingredients at low speed (or with wooden spoon), until all flour is hydrated, and rough ball forms. Let dough rest for 5 minutes.

Knead at medium-low speed (or with hand) for 2 minutes, adjusting with a little more water, if needed. (Dough should be somewhat sticky.) Resume kneading for another 4 minutes. (Dough should still be a bit sticky.)

Transfer dough to a lightly wet or oiled work surface. With wet or oiled hands, stretch or pat dough into a rough square. Fold like business letter in 3 parts, then repeat the same folds from the left and right side.

Pick up dough ball, gathering edges underneath, and place, seam side down in lightly oiled bowl. Cover, and let rest for 10 minutes. Repeat this stretching and folding 3 times more, at 10 minute intervals. After the last fold, place dough in oiled bowl or container, cover, and refrigerate overnight.

Ready for baking

DAY 2:
Divide cold dough*) into 10 - 12 equal pieces. Shape rolls, or torpedoes, and place them, smooth side up, on parchment lined baking sheet (I like using a perforated baking sheet). Place hazelnut pieces for topping on a plate.

Brush rolls with egg wash, and dip in hazelnuts. Gently press nuts down, so that they stick. Let proof 45 - 60 minutes, or until rolls have grown 1 1/2 times their original size, and a dimple, poked with your finger, doesn't fill up again.

Preheat oven to 400ºF/200ºC. Bake rolls for 12 minutes, rotate 180 degrees, and continue baking for about 13 minutes more, until they are deep golden brown.

Let rolls cool on wire rack.

*)  With rolls it is not necessary to let them come to room temperature before shaping. They warm up fast.


 Submitted to Yeast Spotting

Updated 12/28/13