Friday, October 27, 2017

GERMAN SUNFLOWER SEED SQUARES - HEARTY SOURDOUGH ROLLS WITH RYE & SEEDS


Hier geht's zur deutschen Version dieses Posts


Whenever I'm visiting my hometown Hamburg, I check out new bakeries. Two years ago I noticed people lining up in front of Bäckerei Jochen Gaues, in Eppendorf quarter, where my Mom lives around the corner.

Taking this as a good omen, I joined the waiting line. The shelves full of loaves and rolls looked promising, all with fairly dark crusts - boldly baked, as Ken Forkish ("Flour, Water, Salt and Yeast') would call it. A paradise for crust lovers!

Like Forkish, Jochen Gaues is a purist baker, his breads are made with flour, water, salt and yeast. No dough enhancers, no preservatives, no artificial flavoring. Only sourdough and passion for his craft. And he shared his recipes in a beautiful baking book, too.

His sunflower seed rolls are hearty, crusty and delicious. (I tweaked the recipe a bit, of course, as I always do). The crumb is rather light and more airy than chewy. You can enjoy them with cold cuts, German meat salad, honey or jam. 

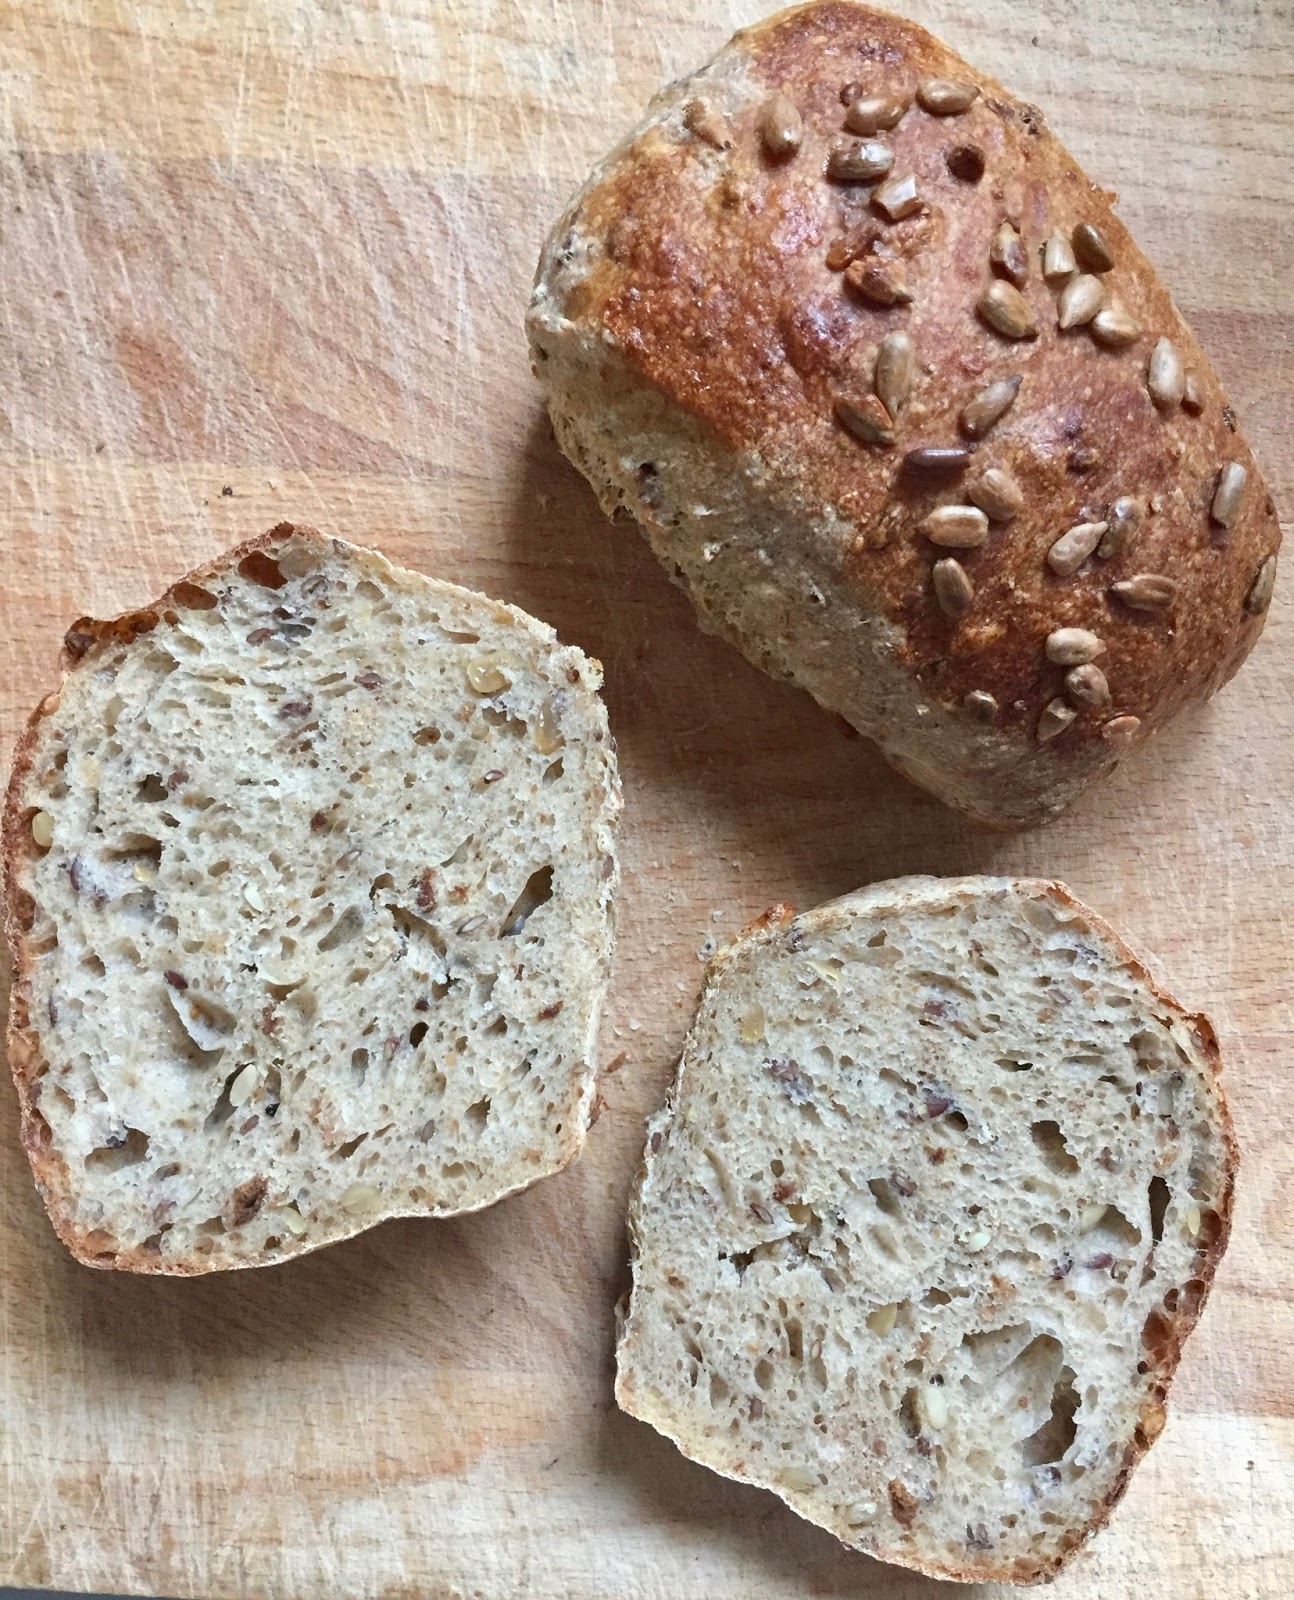
The rolls have a thin, crisp crust and a somewhat airy crumb


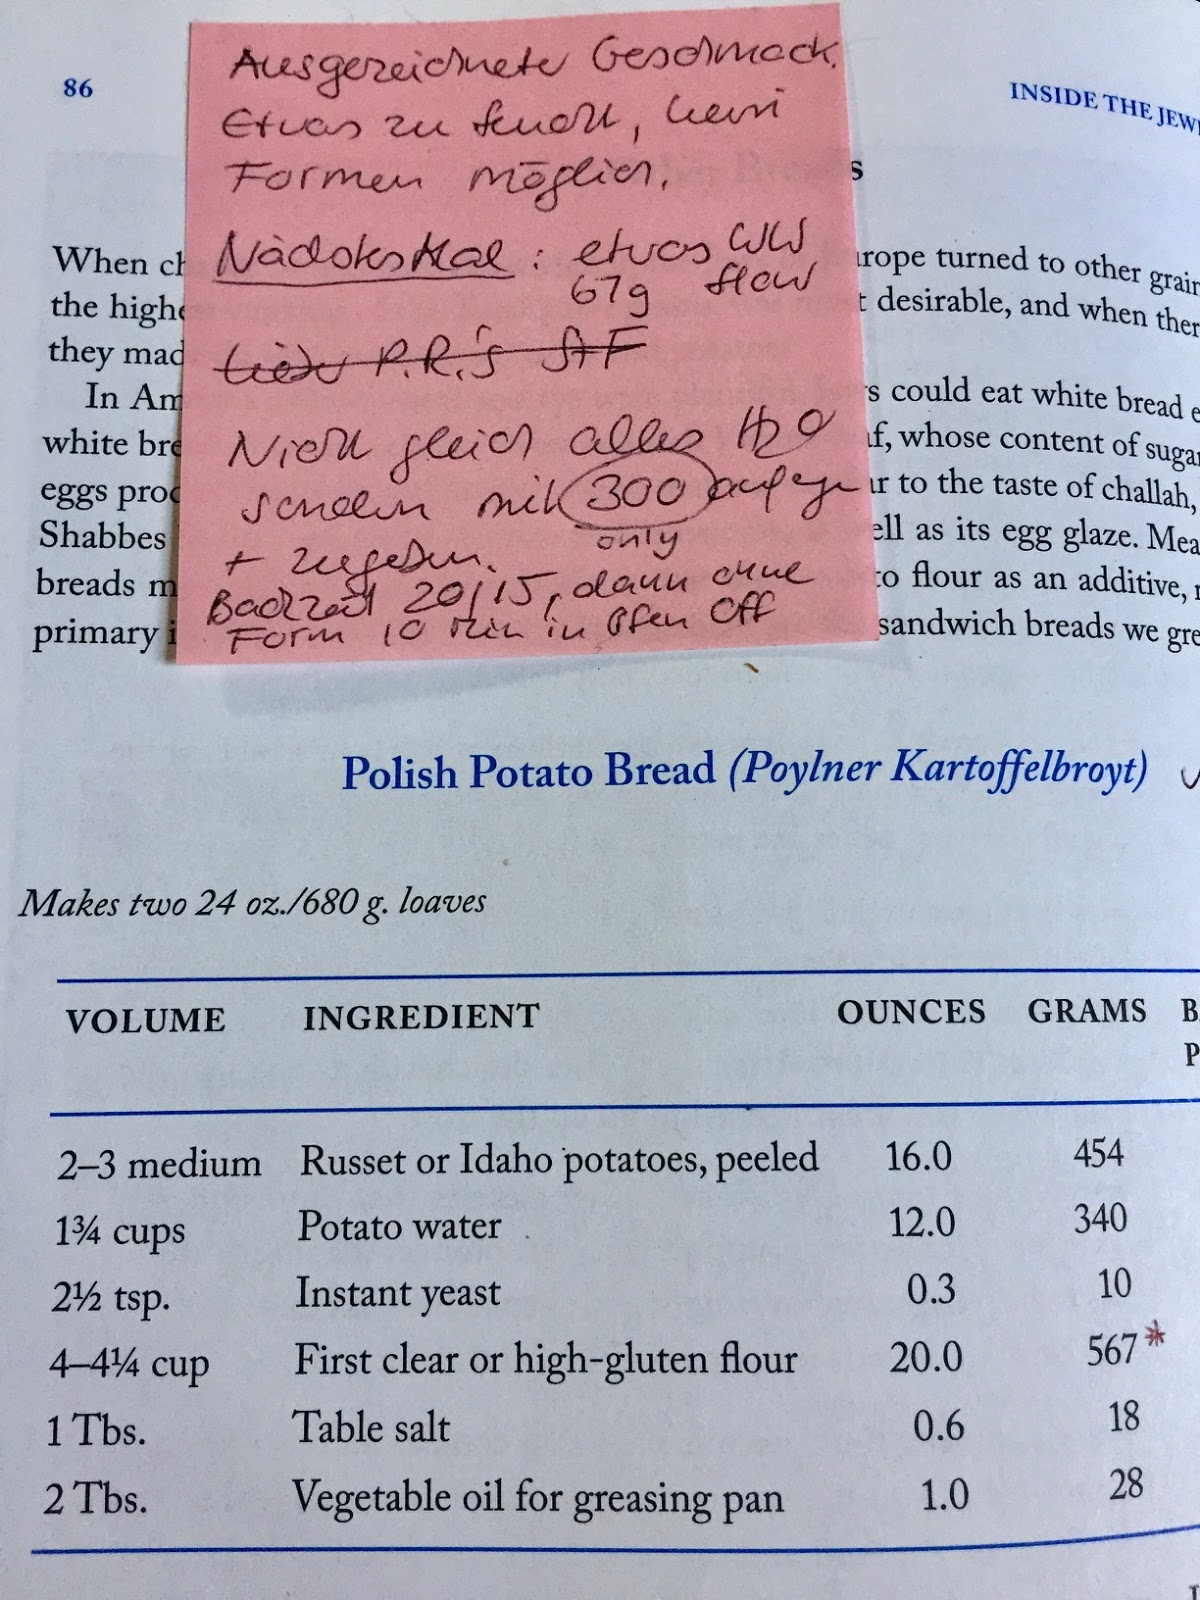
SUNFLOWER SEED SQUARES  (adapted from Jochen Gaues' "Brot")
(8 square rolls)

Starter
  10 g/0.3 oz recently refreshed rye mother starter (100%)
  10 g/0.4 oz water, lukewarm
  10 g/0.4 oz rye flour

Soaker
  25 g/0.9 oz cracked rye
  25 g/0.9 oz flaxseed
  50 g/1.8 oz water 

Final dough
  30 g/1.1 oz starter (all)
367 g/12.9 oz water (95°F/35ºC)
    3 g/0.1 oz instant yeast
475 g/15.8 oz bread flour
  50 g/1.8 oz old sourdough bread, ground and toasted
  25 g/0.9 oz medium rye flour
  25 g/0.9 oz sunflower seeds, toasted
  14 g/0.5 oz sugar
  14 g/0.5 oz salt

egg white, mixed with a little bit of water, for brushing
sunflower seeds, for topping

Seed soaker and rye starter

DAY 1
In the morning, mix starter ingredients in small bowl. Leave, covered, at room temperature for 4 - 6 hours, or until it passes the float test (a teaspoonful should float in water).

In second small bowl, stir together soaker ingredients. (This extra step is not absolutely necessary, but hard ingredients like rye chops and flax seeds benefit from longer soaking.)

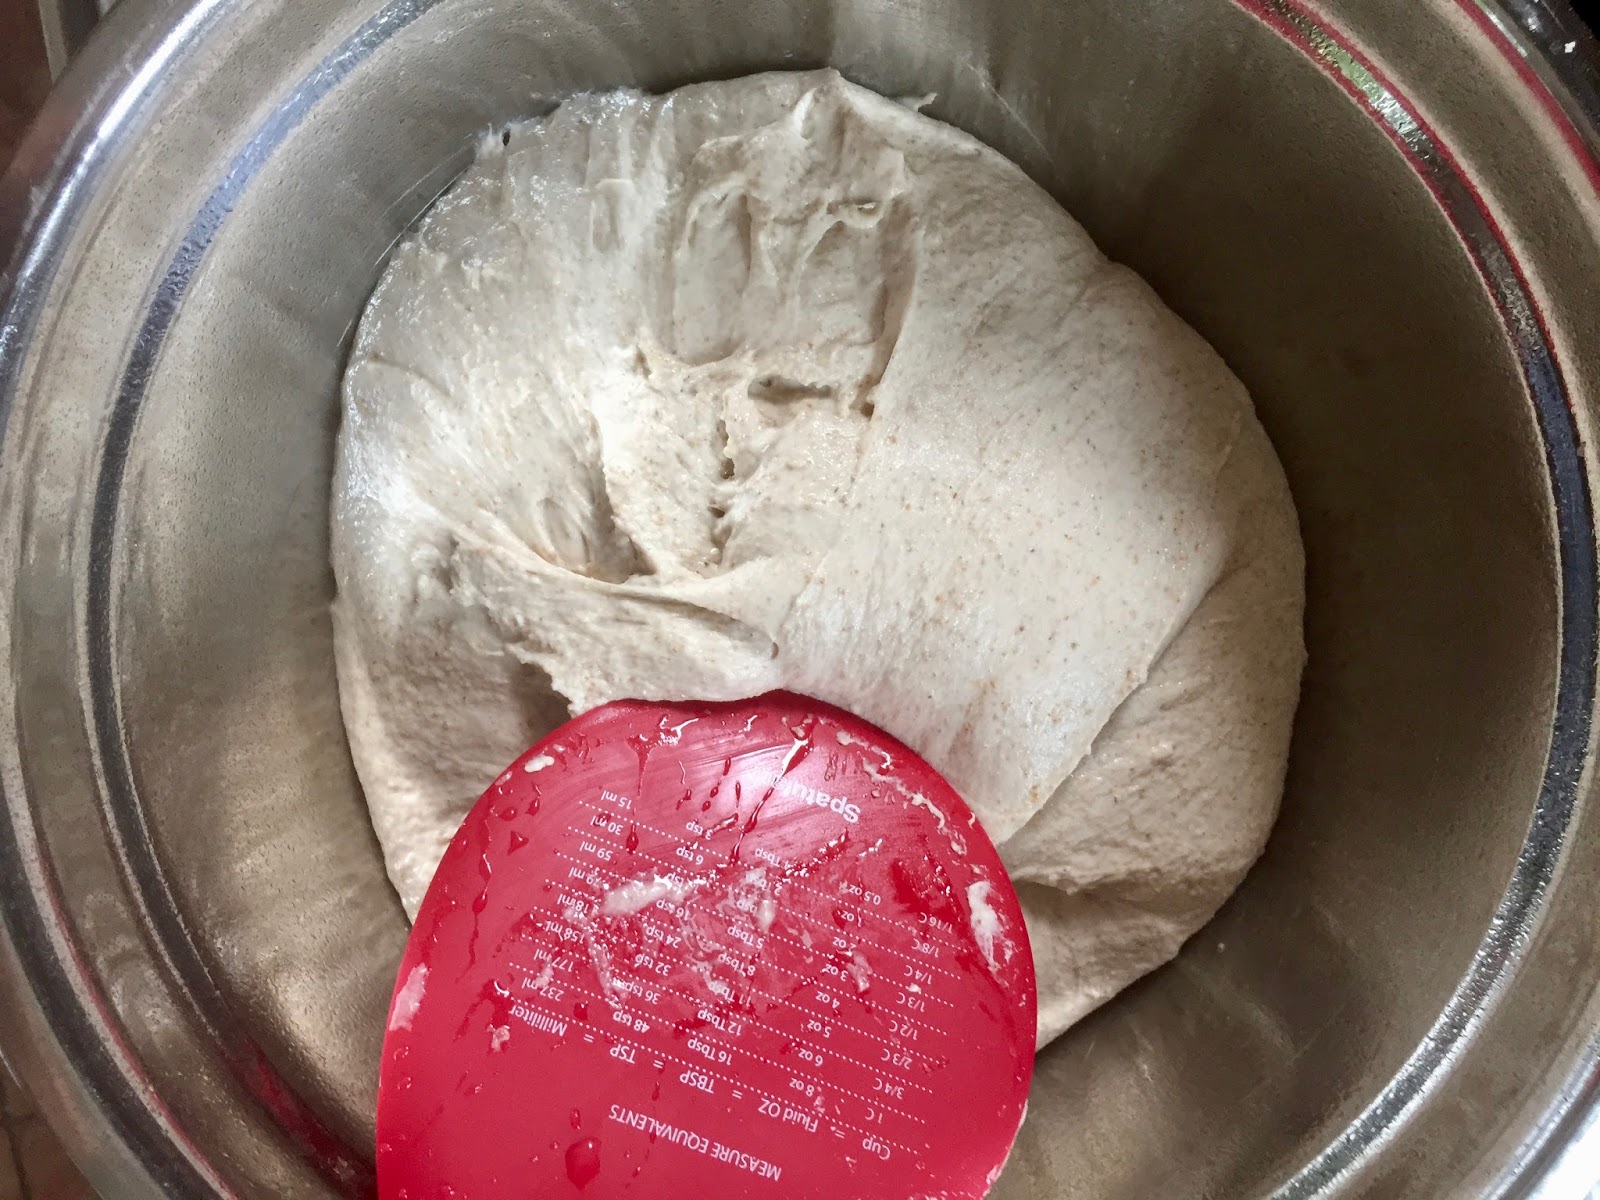
In the afternoon, mix final dough at low speed until all flour is hydrated, 1 - 2 minutes. Let dough rest 5 minutes, then knead at medium-low speed for 6 minutes. Dough will be soft and sticky, but pull back from sides of bowl. 

Dough will be sticky, but pull back from sides of bowl

Transfer dough to lightly oiled work surface. With oiled hands, pat and pull it into a rough square. Fold dough from top and bottom in thirds, like a business letter, then the same way from both sides.

Pat and pull dough into a square...
...then fold in thirds, top down, and bottom up...
...like a business letter.
Repeat folding from both sides...
... until you have a neat package

Cover dough package with the empty mixing bowl (if necessary, re-oil works bench). Let it rest for 10 minutes.

Repeat stretching and folding the dough 3 more times, at 10 minute intervals. It will gain strength and starting to resist. Place dough in oiled container, cover, and refrigerate overnight (a square container helps with shaping later).
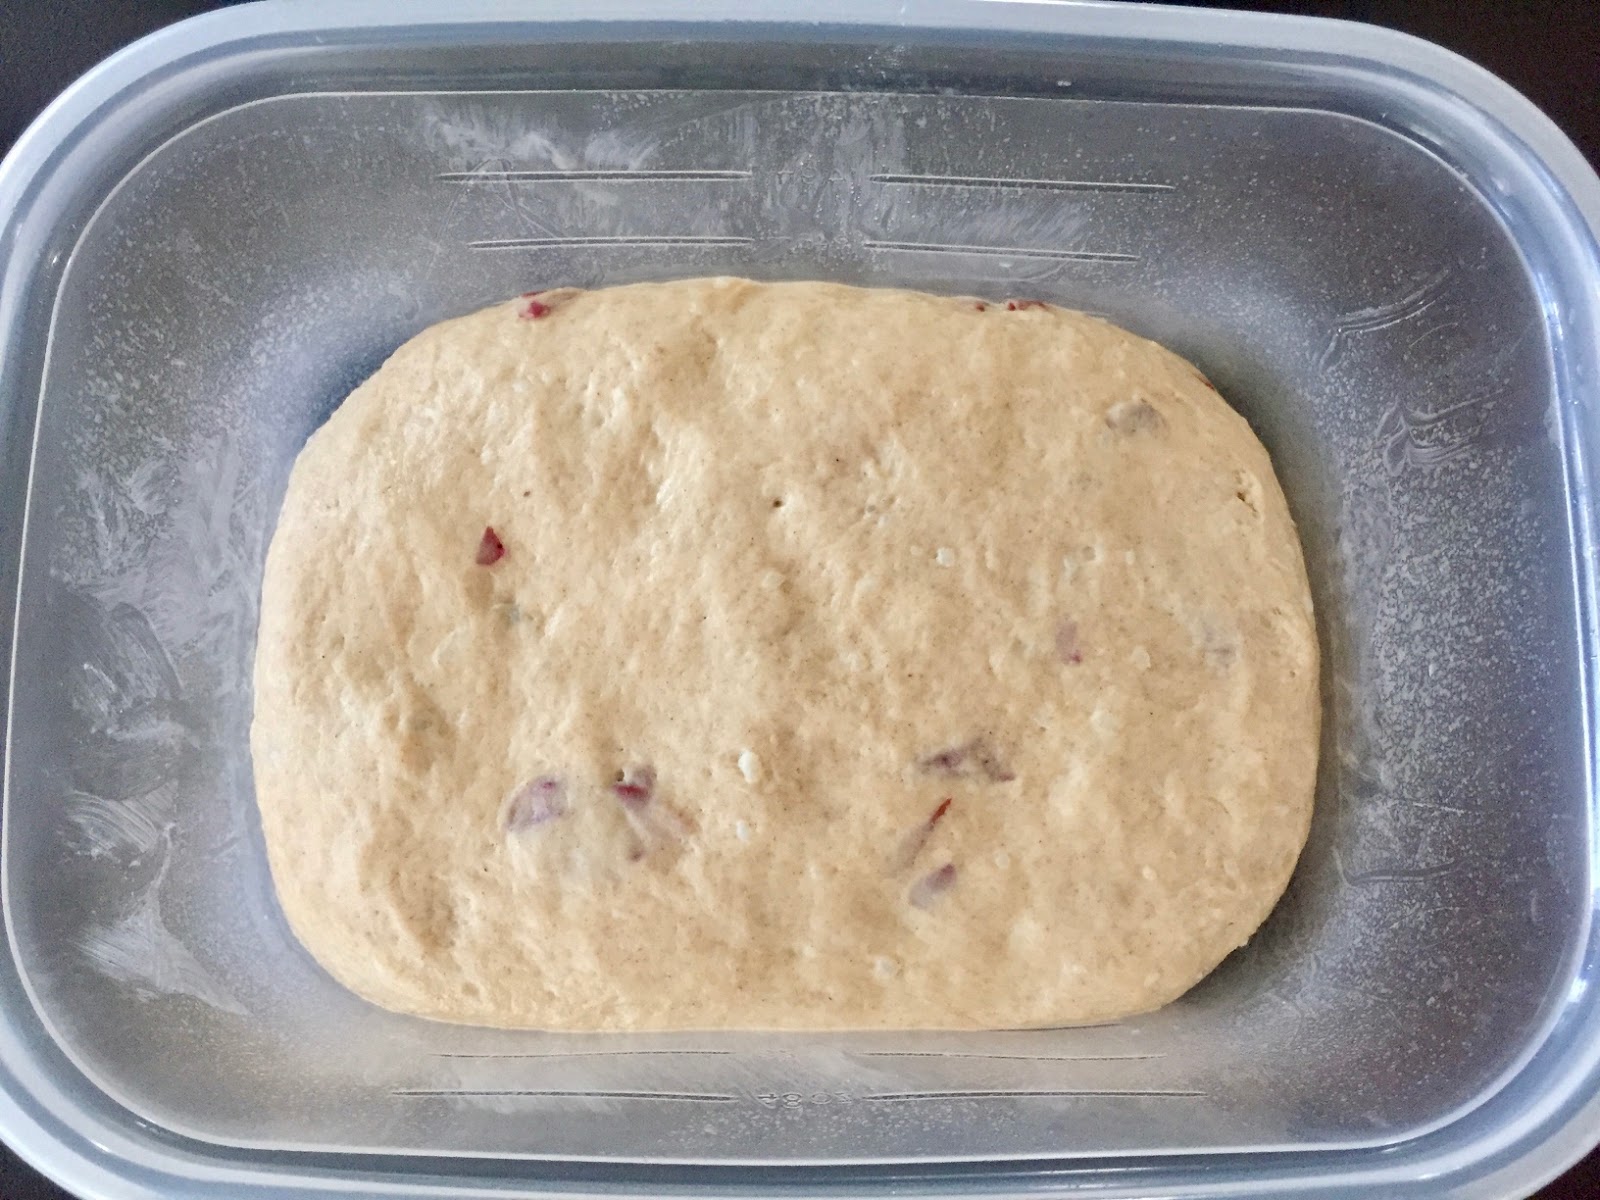
Before...
...and after fermentation: it has doubled in volume

DAY 2
Remove dough from fridge 2 hours before using. It should have doubled in volume.

Preheat oven to 475ºF/240ºC (no steam).

Place dough on a lightly floured work surface, sprinkle with a little flour (it will still be a bit sticky), and gently pull and pat it into a rectangle, then cut into 8 square pieces. Place squares on parchment lined (or perforated) baking sheet.

The rolls are cut, not shaped

Brush rolls with egg white, then sprinkle each with sunflower seeds, gently pressing them down to stick. Cover, and proof for about 25 - 30 minutes, or until a finger-poked dimple remains visible. (Since the dough is cut, not shaped, it is puffy and doesn't need to rise much more - basically only until the oven is hot).

Ready for the oven

Bake rolls for about 20 minutes (rotating them halfway through), or until they are a dark golden brown, and register at least 200ºF/93ºC on an instant read thermometer.

Freshly baked Sunflower Seed Squares

BreadStorm users (also of the free version) can download the formula here.


Monday, October 16, 2017

POLISH POTATO BREAD - A FAVORITE LOAF FOR WORLD BREAD DAY 2017


Hier geht's zur deutschen Version dieses Posts


Before my friend "The Rye Baker" Stanley Ginsberg went on his mission promoting European rye breads to American bakers, he had published another remarkable baking book: "Inside the Jewish Bakery - Recipes and Memories from the Golden Age of Jewish Baking".

I was among his test bakers. One of my test recipes was the Polish Potato Bread - Poylner Kartoffelbroyt - with its unusually high potato content an interesting recipe, but, as I soon realized, somewhat challenging in its preparation.

My first Post-It notes about the recipe

I had problems gauging the necessary water amount, first the dough seemed too dry, then turned sticky from the potatoes.

Not only that: Stanley had warned of dire consequences if you tried taming the gooey dough with more flour - it would turn into a brick!

Somewhat intimidated, I jotted down on my note pad: "No shaping possible".

In the end, somehow, I managed to get the sticky glob into the pan. Or I wouldn't have (later) rejoiced in its "excellent taste!"

At that time I had no whatsoever experience with stickier doughs. Meanwhile, I know better how to deal with the tricky potato bread - the extra flour needs to go on the work surface, under the dough, not into it! 

 Potato Bread tastes especially good when toasted

The excellent taste encouraged me to bake the Potato Bread again and again, while tweaking the recipe a little bit, especially withholding some of the water to (slowly) add it during the mixing later.

Allowing the dough to rest in the fridge overnight, I could reduce the amount of yeast a bit.

This favorite loaf really deserves to be presented at Zorra's World Bread Day 2017,

Golden brown and wonderfully moist

POLISH POTATO BREAD (adapted from Stanley Ginsberg's: "Inside the Jewish Bakery")

227 g/8 oz Russet or Idaho potatoes, peeled or unpeeled *), cut in chunks
170 g/12 oz potato cooking water
4 g/1 tsp instant yeast
250 g/8.8 oz first clear or high-gluten flour
34 g/1.2 oz whole wheat flour
9 g/0.3 oz salt
vegetable oil, for brushing

*) I like using local red potatoes with thin skins and don't peel those

Drain cooked potatoes and reserve 170 g of the cooking water

DAY 1
Cook potatoes in about 2 cups of unsalted water until soft, then drain, reserving 170 g/6 oz of the cooking water. Mash potatoes, and let both cool to room temperature.

Our local red potatoes don't need to be peeled

Mix mashed potatoes, flours, yeast, and 150 g/5 oz of the reserved cooking water at low speed, until all flour is hydrated, 1-2 minutes. (Dough might seem a bit dry at first, but potatoes will add more moisture).

In the beginning the dough seems relatively dry...


.... but soon becomes sticky from the potatoes

Add salt, and knead at medium-low speed for 10-12 minutes, very slowly adding remaining 20 g/2 oz water. Dough will soon become (and remain) sticky, but in the end pull back from sides of bowl. Don't add more flour, if you don't want to end up with a brick!)


Ready for its slumber in the fridge

Place dough in oiled container, cover, and place overnight in the fridge. (Using a square container helps with shaping the bread later.)

Overnight the dough has doubled in volume

DAY 2
Remove dough from refrigerator 2 hours before using. It should have doubled in volume, but will still be sticky. Grease a 9 x 5-inch/23 x 13 cm loaf pan.

The dough will still be sticky - flour your hands and bench knife!

Transfer dough to a lightly floured work surface. With floured hands (or bench knife), pat and push it into a rough rectangle. Lift one shorter end up and fold it over a little bit, pressing gently down to seal. Continue rolling up dough in the same way into a log.

Place loaf, seam-side down, in the prepared pan

Re-flour your hands, (or bench knife), and - this is the tricky part - lift the loaf cylinder up and place it, seam-side down, into prepared pan.

Brush top of loaf with oil, cover pan, and proof until top of dough has reached rim of pan, and a dimple, pressed with your finger, will not fill up at once (about 45 - 60 minutes).

Preheat oven to 375ºF/190ºC (no steam).  

Ready to be baked

Score loaf lengthwise (snipping with scissors works better for sticky a dough than a lamé.)

Bake bread for 20 minutes (no steaming), rotate pan 180 degrees for even browning, and continue to bake for about 20 minutes more, or until loaf is golden brown (internal temperature should be at least 195ºF/90ºC.)

Freshly baked Polish Potato Bread

If you like your crust to stay crispier, leave bread in switched-off oven, with door slightly ajar, for an additional 10 minutes to dry. Then turn loaf out onto rack and let it cool completely.

STORAGE: The bread keeps for at least 3 days, wrapped, at room temperature. It, also, freezes well. If you slice it before freezing it, you can take out single slices for toasting.

Baked with German flour type 1050, the crumb looks a little darker

BreadStorm users (also of the free version) can download the formula here:

Sunday, August 20, 2017

SOLAR ECLIPSE BREAD - A CRUSTY SESAME LOAF FOR A RARE EVENT

Hier geht's zur deutschen Version dieses Posts


This month Mini Oven challenged fellow Fresh Loafers to create a special bread to commemorate the upcoming total eclipse of the sun. Spurred by astronomic ambitions I began to ponder how to go about this.

Just a new bread? Where was the connection to the total eclipse?

A two-toned dough? Once I baked a marbled rye bread and found its taste rather underwhelming.

Squid ink as a black dye? Not my cup of tea!

So it had to be a two-toned decoration. Black and white sesame seeds are in my pantry. Only a suitable recipe was missing. It couldn't be a loaf whose oven-spring would tear and destroy any decorative topping.

The answer was a flat bread that would spread more than rise.

I found a good starting point in Austrian baker Dietmar Kappl's Fladenbrot, tweaking it to suit my needs: with a long, cold bulk fermentation and the introduction of a little whole grain flour (I tried it with rye and emmer - both tasted great).

To emulate the eclipse I needed a ring-shaped utensil to press the outline of the moon into the dough. A large yogurt tub had just the right diameter (11.5 cm/4.5 inches).

We were so happy with my crusty, nutty flat bread that I baked it again, two days later, for my customers at A&B Naturals.

Baked again for my customers: Solar Eclipse Bread

SOLAR ECLIPSE BREAD  (adapted from Dietmar Kappl/homebaking.at)
(3 small breads, à 300 g)

Starter
25 g bread flour
25 g emmer flour (or other whole grain flour of your choice)
50 g water (lukewarm)
10 g recently refreshed and active starter (100% hydration)

Final Dough
110 g starter (all)
400 g bread flour
50 g emmer flour (or other whole grain flour)
325 g water, lukewarm
15 g olive oil
10 g salt
1.5 g instant yeast (or 3 g active dry yeast)

Decoration
black and white sesame seeds (or use poppy seeds instead of black sesame)

Specal tool: glass or plastic container with approx. 11-12-cm/4.5-inch diameter, like a large, empty yogurt tub (to imprint the outline of the moon).

DAY 1
In the morning: mix all starter ingredients. Cover, and leave for 4-6 hours at room temperature, or until a few tiny bubbles appear on the surface, and a teaspoon of dough floats in water (float test).

The Ankarsrum makes short work of kneading the dough

For the final dough, mix all ingredients about 1 minute at low speed until all flour is hydrated. Knead 1 minute at medium speed, let rest for 10 minutes (autolyse), then resume kneading for about 3-4 minutes, until dough pulls somewhat back from sides of bowl (or, for the Ankarsrum, from roller) (dough will be sticky).

Using wet bowl scraper, fold dough all around from sides to the center

Transfer dough to a lightly oiled bowl. Using wet (or oiled) bowl scraper, fold dough all around from sides of bowl to the center (about 8x).

Let dough rest for 10 minutes, then repeat the folding process 2-3 times at 10-minute intervals, until dough has developed enough strength and shows resistance to folding. It will still be a little sticky.

Cover bowl tightly with plastic wrap and place in refrigerator overnight (no need to de-chill).

After 2 sets of folds the dough looks quite smooth already

DAY 2
Preheat oven to 475ºF/250ºC, (including steaming device). Adjust rack to middle position.

Place cold dough (it will still be sticky) on lightly floured work surface. Dust top with a little flour, and divide into 3 equal sized pieces (about 304 g). Shape into rounds.

Divide dough in 3 equal pieces and shape into rounds

Place breads, seam-side down, on parchment lined baking sheet. Mist with oil (or mist plastic foil cover with oil) and cover with plastic wrap. Let rest for 45 minutes, or until they are a bit puffed and a dimple, poked with your finger into the dough, remains visible. 

The moon outline must be deeply imprinted into the dough

Lightly oil the rim of the glass or plastic tub. Press down deep (almost to the bottom) into the dough (breads will spread and flatten.)

I tried to create different "stages of the solar eclipse"

Mist breads with water. Using a teaspoon, carefully sprinkle with black sesame (moon shadow) and white sesame (sun.)

Bake breads, with steam,  for 10 minutes. Remove steam pan, and reduce temperature to 450ºF/230ºC. Bake for another 10 - 13 minutes, or until breads are golden brown and register at least 200ºF/93ºC.

Let breads cool on a wire rack. (When cooled, they can be frozen, wrapped individually in foil, and placed in a freezer bag. Let come to room temperature, mist with water and re-crisp in the oven at 375ºF/190ºC).

Baked solar eclipse!

BreadStorm users (also of the free version) can download the formula here:

And this is the perfect music for a Total Eclipse:

Wednesday, July 19, 2017

IS ONE EGG AN OEUF? - EUROPEAN-AMERICAN EGG "TRANSLATION"


Hier geht's zur deutschen Version dieses Posts


When I started reading American cookbooks and food magazines, I noticed that their recipes almost always call for large eggs, whereas the typical egg in German recipes is medium-sized (Kl. M).

Though (supposedly) everything is bigger in the US, I was wondering about this. Why should American cooks and bakers in general use larger eggs than their European counterparts?

My experiences with the differences between European and American flour types and dairy products taught me that I should better not automatically assume that a "large egg" in Maine is the same as "ein grosses Ei" in Hamburg.

Contrary to what some people believe, size doesn't always matter - at least not for eggs - it's all about the weight!

The typical American recipe egg is "large" - but only medium-sized!


        EU-STANDARD                                                     US-STANDARD  

Class      Weight per Egg                                   Class       Minimum Weight per Egg
XL              73 g or more                                     Jumbo                   70.9 g (30 oz)
L                 63 g - 73 g                                        Extra Large           63.8 g (27 oz)
M                53 g - 63 g                                        Large                    56.7 g (24 oz)
S                 53 g or less                                       Medium                49.6 g (21 oz)
                                                                             Small                    42.5 g (18 oz)


Okay, then a US standard "large" egg equals an European "medium" egg. Right? Well, it's a bit more complicated.

When I want to know the weight of cups and tablespoons of baking ingredients, I check my friend The Rye Baker Stanley Ginsberg's NY Bakers' Ingredient-Weight Table (based on the USDA Nutritional Values Database.) And there I find a regular "large" egg listed with a weight of only 50 grams/21 ounces. That's almost 7 grams/0.25 ounces less!

The New York Times and other newspapers, as well as foodie magazines, like Cook's Illustrated or Bon Appétit, all base their recipes on this average Joe 21-ounce egg.

Whether your breakfast egg is standard size or not - who cares!

But should you really care whether your breakfast eggs meet the standard minimum weight? Probably not.

These little differences matter if you bake egg-rich pastry (where the difference compounds), or need to work with halves, or fractions of whole eggs.

To adapt large cakes to smaller versions - which I often do, since we are only two people - I use the practical Pan-Conversion-Tool von Keiko's Cake. For this calculation I need to know the weight of each ingredient.

With miniature cakes, like the glorious Bohemian Hazelnut Torte or traditional Dresden Rhubarb-Eierschecke-Torte, a difference in the egg content does have an impact on the results.

Miniature Bohemian Hazelnut Torte

Before I knew better, I would have simply taken either the yolk or white to get to 1/2 egg. But too much egg yolk makes a batter tough and dry.

And, after once being served a low-cholesterol scrambled egg, made of egg whites only, I knew why you should better not divide an egg like that: the white scrambled egg was bland and tasteless!

How do you divide an egg? Very easy: you crack it into a cup, stir well with a fork, and then weigh the desired amount.

Dan Lepard's Ale Crust Potato Pasties with a golden, egg washed crust

The egg leftovers you can work into your next scrambled eggs, or use as glaze for other pastries, for example Dan Lepard's tasty Ale Crust Potato Pasties.

Saturday, June 3, 2017

ROYAL TREATMENT FOR LEFTOVER PANCAKES - KAISERSCHMARREN


My husband and I love pancakes! At least once a week we have them for lunch, made with all kinds of different grains, nuts and fruits. And, of course, our traditional family recipe, my Omi's German Pancakes.

Franz Joseph of Austria 1910 old.jpg
Emperor Franz Josef loved Kaiserschmarren
I always cook a whole batch of them, even though we are only two, and I could just halve the recipe.

There's a good  reason:: leftover pancakes can be easily recycled into an (almost even more delicious) dish: Kaiserschmarren!

A famous Austrian dessert, Kaiserschmarren ("Emperor's Mess") is made from twice-fried pancakes.

First you bake regular fluffy pancakes, then you mess them up by ripping them apart, creating a "Schmarren" -  a mess in Austrian dialect. After that, you refry the torn pancakes in butter, together with raisins and other add-ins.

Emperor Franz Josef I, to whom the royal "mess" was dedicated, supposedly loved this rich dessert.

His Empress Elisabeth, anxiously watching her famed hourglass waistline, most likely not so much.

But since those painfully strait-laced days of yore are past, we can follow His Majesty's example, happily indulging in refried pancakes - and with a good conscience to boot, since we are thrifty recyclers!

Typical add-ins for Kaiserschmarren

LEFTOVER PANCAKE KAISERSCHMARREN  (2 servings)

2 servings of leftover pancakes, any kind (4 to 8, depending on size)
1-2 tbsp butter, for frying
1/4 cup sliced almonds
1/4 cup golden raisins (or to taste)
powdered sugar or cinnamon sugar, for sprinkling

Tear leftover pancakes in small pieces

Using two forks (or your fingers), tear pancakes in bite-sized pieces.

In large skillet, heat butter over medium heat. Add pancake pieces, and cook, stirring frequently, until they are warmed through.

Cook pancake pieces with almond slices and raisins, stirring often

Stir in raisins and almonds, and fry until pancakes are crisped, and almond slices are starting to brown.

To serve, dust the pancakes with powdered sugar. Or sprinkle them with cinnamon sugar, like I do.

We like the faux Kaiserschmarren with maple syrup and lingonberry preserve. (The classic accompaniment for this dessert is plum compote.)

Finally we have spring after this long, cold winter!

Tuesday, April 11, 2017

BREWER'S BREAD WITH SPENT GRAINS


Hier geht's zur deutschen Version dieses Posts


When I heard about breads made with spent grains - leftovers from beer brewing - I was fascinated.

How interesting! But, where on earth, could you come by those mashed grains, unless you worked at a brewery? We have two micro-breweries in Bar Harbor, so I left a message, asking whether I could purchase a small amount of their spent grains.

The sobering answer: the mash goes to the dogs hogs. All sold to pig farms - sorry!

So I gave up on the idea. Then, two years ago, I found a Groupon in my emails with a real bargain on a small brewing kit. A beer drinker, and always curious, I ordered it  - but then the bulky package ended up in the basement, with other rarely used kitchen equipment, like the lobster pot.

It's alive! My beer is bubbling away
The best of all husbands needs some quality solitude now and then, playing his guitar and recording his music.

Left to my devices, I unearthed beer kit and lobster pot (just the right size for the mash!), and went around in the house with a thermometer.

Our guestroom closet proved to be the ideal environment for beer fermentation: cool, but not cold. And dark. 

Looking at the packages with malted barley, I realized: here was not only the base for my first (hopefully successful) stab at brewing, but, also, finally, the source for spent grain.

I visualized us drinking my very own Pale Ale, while enjoying a loaf made with the leftovers.

Whether the beer will be drinkable or not, I don't know, yet. Its precursor is foaming, happily bubbling away, next to our winter boots in the closet.

Many of my bread concoctions are based on porridge breads à la Tartine, tweaked to meet my needs (a bit tangier) and accommodating all kinds of grain/nut/seed combinations, like the squirrel-channeling Acorn Levain.

The bread I came up with contains a good measure of spent grains along with whole wheat. It turned out to be a very pleasing, hearty loaf - this newbie brewer was delighted! Definitely a keeper.

And I still have a bag of barley mash stored in the freezer, for my next recycling adventures.

Spent grains - malted barley from beer brewing


BREWER'S BREAD

Starter
10 g/1/2 tbsp very active starter (refreshed twice the day before)
50 g/1.5 oz bread flour
50 g/1.5 oz whole wheat
100 g/3.5 oz water (80-85ºF/26-29ºC)

Final Dough
100 g/ 3.5 oz bread flour
150 g/5.3 oz whole wheat flour
250 g/8.8 oz all-purpose flour
35 g/1.2 oz wheat germ
430 g/ 15.2 oz water
210 g/7.4 oz starter (all)
15 g/ 0.5 oz salt
250 g/8.8 oz spent grains (mash leftovers, from beer brewing)

Topping
grain flakes, cracked grains, or bran (I used barley flakes)

Float test - when a spoonful of starter rises to the surface,  it's ready to go

DAY 1
6:00 - 8:00 am: Mix starter. Leave for 4 - 8 hours, or until a spoonful of starter floats in water (if not, it needs to ferment longer!)

Whisk together flours and wheat germ
Dissolve starter in water

Whisk together flours and wheat germ in medium bowl. In large bowl, mix starter and 400 g/14.1 oz of the water, until starter has dissolved.

Mix the dough until all flour is hydrated

Add flour mixture to bowl with dissolved starter, and stir (Danish dough whisk or per hand) until all flour is hydrated. Let dough rest, covered, for 30 minutes at warm room temperature.

To incorporate the salt, pinch and fold the dough several times

Add salt and remaining slightly warm water, pinching and folding dough to incorporate (as described here for Einkorn Hazelnut Levain). Let it rest for 30 minutes.

Add the spent grains during the second fold

Add spent grains to the bowl. Again, with wet hands, fold and pinch dough several times (as described here for Einkorn Hazelnut Levain), until grains are mostly incorporated.

When the dough is visibly swollen, transfer it to the work bench

Continue to let dough rise for 2 1/2 hours more, stretching and folding it 5 times at 30 minute intervals. If it's not swollen (with a 20-30% increase in volume), leave it for another 30 - 60 minutes.

With an oiled bowl scraper pre-shape dough into a tight ball

Sprinkle half of the work surface with flour, leaving the other half free. Transfer dough to the floured part. Lightly flour top. Using an oiled spatula, work dough into a taut, smooth round by drawing the spatula in circles around and under the side to create surface tension.

Prepared basket (here with a grain mix)

Re-flour top, cover dough with the empty bowl, and let it rest for 20 - 30 minutes. Generously flour rising basket with a 50/50 mixture of wheat and rice flours. Sprinkle a layer of grain flakes, grain chops, or bran over bottom of basket (prevents sticking and makes a nice topping).

Shaping the dough by folding it from four sides

Using oiled bench knife, flip dough around, so that the floured side is down. With floured hands, fold bottom end of dough up to a third, then fold both sides over the center to elongate.

Next, fold top down to the center, then fold the bottom up again to cover top fold, so that package is closed. Flip dough package over to the un-floured part of the counter, so that the seam is underneath.

Shaped loaf

With both (floured) hands, rotate dough ball, while pulling it towards you, so that it tightens.

Place loaf, seam-side up, in rising basket. Sprinkle with flour, cover tightly with plastic wrap, and place it in the refrigerator overnight. (No warming up necessary!).

Ready to go to sleep in the fridge

DAY 2
Preheat oven to 500ºF/260ºC, with a Dutch oven (with lid) on middle rack.

Place a large piece of parchment paper on the counter, and keep scissors, a sharp knife or lamé and a brush at hand. A paper sling makes the transport of the loaf into the very hot pot easy - and painless!

Preparing the loaf for the Dutch oven baking (here with Acorn Levain)

With an energetic smack of the rising basket on the counter, turn bread out onto parchment paper. Cut paper around loaf to make a sling, leaving two 2 wide handles (see photo - this prevents the paper from creating folds that would press into the loaf).

Score bread and brush off excess flour from parchment (so that you don't end up with a lot of burnt flour in the pot.)

A paper sling makes the transfer to the hot pot painless and easy

Remove hot pot from the oven, and take off lid (I recommend leaving an oven mitt on the lid to remind you it's hot). Transfer bread with the paper sling into Dutch oven. Replace lid, and put it in the oven.

Bake bread for 20 minutes, then reduce temperature to 450ºF/230ºC and bake for another 10 minutes. Remove lid, and continue baking for 20 - 25 minutes more, or until loaf is golden brown (internal temperature at least 200ºF/93ºC.)

Freshly baked Brewer's Bread


BreadStorm users (also of the free version) can download the formula here.