Hier geht's zur deutschen Version dieses Posts
The best recipe collection (bread, rolls and snacks) of German bakers' magazine,
"Allgemeine Bäckerzeitung", supplied this "seedy" bread for my "Equal Opportunity Baking" list.
A heavy weight, scaled for 21 loaves, with selling points, marketing tips, production cost and time calculation, including sales tax (7%) and even a suggested retail price (1.83 Euro). The production steps are briefly listed - no need to explain to professionals what they do every day.
Scaling the ingredients down to home baking proportions was not difficult (a minimum of 3 loaves), and the instructions, though brief, were precise, and didn't overtax my mental capacities.
The recipe said (more or less) only: "make a dough". I tried to stretch and fold it, but that didn't work too well, the dough was too wet. Therefore, instead of soaking only the flaxseeds in hot water for 1 hour (original recipe) I would include some of the flour in the soaker, to have a larger preferment, and more water already absorbed in the flour.
I like to retard my doughs, overnight fermentation works better for my schedule, and, also, improves the taste (the original recipe had only the longer starter development.)
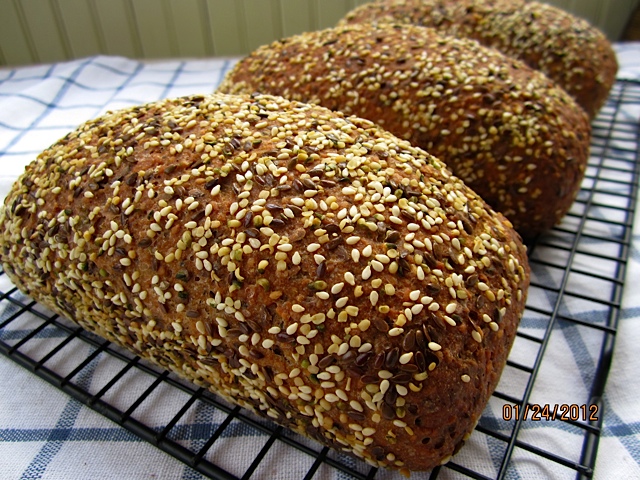
The Bäckerzeitung says: "roll the shaped loaves over a wet towel, and then dip them into the (topping) seed mixture". Though this coated the breads nicely with seeds, they didn't stick well enough, and a lot of them fell off during and after baking. Next time I would brush the loaves with egg white, instead of just moistening them with water.
The breads turned out very nice, crusted with seeds they looked quite attractive, and the taste? Modestly (haha!) I will only quote my friend Lynn - beneficiary of this triplet bake: "Our seedy, seedy bread was delish! We toasted it which really brought out the flavor of the seeds! Mmmmmmm!"
SAATENBROT - MANY SEED BREAD (3 loaves, ca. 600 g each)
SOAKER
143 g whole wheat flour
84 g medium rye flour
299 g water
4 g salt
129 g flaxseed
STARTER
21 g rye mother starter (mine is 100% hydrated)
214 g medium rye flour
214 g water, lukewarm
FINAL DOUGH
130 g medium rye flour
143 g bread flour
187 g water
5 g instant yeast
12 g salt
129 g sesame, toasted
129 g hemp seeds
2 g anise, caraway, fennel and/or coriander
1 egg white (for brushing)
14 g sesame seeds (for topping)
14 g hemp seeds (for topping
14 g flaxseed (for topping)
DAY 1:
In the morning, stir together all ingredients for soaker, cover and let sit at room temperature. Mix all ingredients for starter (in 1-step), cover and let ferment at room temperature.
In the evening, mix together all ingredients for final dough for 1 - 2 minutes on low speed. Knead on medium-low speed for 4 minutes (or knead by hand). Let dough rest for 5 minutes. Resume kneading for another minute (dough will still be somewhat sticky). Divide dough into 3 portions, place in oiled containers, cover and refrigerate overnight.
DAY 2:
Remove dough from refrigerator 2 hours before using. Shape into sandwich loaves, or bâtards for free standing loaves. Brush breads with egg white, and then roll over seed mixture.
Place breads in oiled loaf pans, if making sandwich loaves, or bâtards on parchment lined baking sheet (no scoring.) Mist with spray oil, cover, and let rise for 45 - 60 minutes, or until they have grown 1 1/2 times their original size.
Preheat oven to 240ºC/465ºF, including steam pan. Place breads in oven, steaming with 1 cup of boiling water. Bake at falling temperatures: 10 minutes at 240ºC/465ºF, 10 minutes at 220ºC/428ºF, then turn loaves out onto baking sheet, remove steam pan and continue baking for 10 minutes at 200ºC/400ºF, and 10 minutes at 180ºC/355ºF. The internal temperature should be at least 200 F/93 C.
Let breads cool completely on wire rack before slicing.
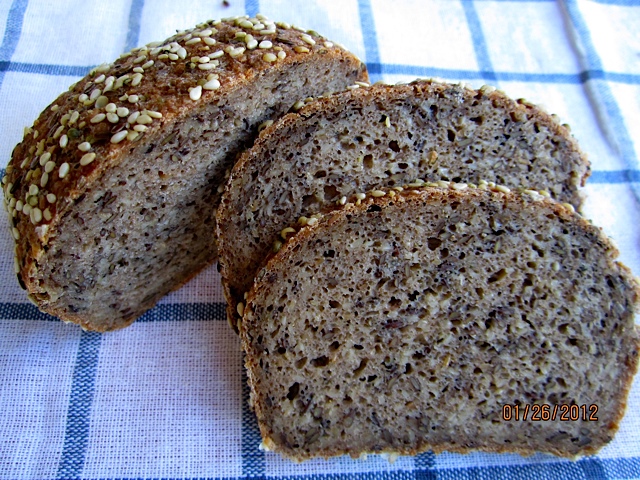
Update: I made them again, this time with chia instead of hemp seeds, and as free standing bâtards. With flour included in the soaker, it was much easier to handle the final dough. Brushing the loaves with egg white worked much better for the seed topping than the wet towel method.
Saatenbrot - Many Seed Bread
The German version of this post you'll find here. Submitted to YeastSpotting

