Showing posts with label Pie. Show all posts

Wednesday, March 14, 2018

COCONUT CREAM PIE FOR INTERNATIONAL PI(E) DAY

Hier geht's zur deutschen Version dieses Posts


To mathematicians the Greek letter π (Pi) is the symbol for the ratio of a circle's circumference to its diameter. This number is so important that it has its own holiday day: Pi Day.

Pi Day is March 14, since π starts with 3.14... and continues, irrationally, ever after. (But don't despair: for your daily use you can get by with just the first six numbers: 3.14159).

Not only mathematicians observe Pi Day, bakers honor it, too. After all, the Greek letter sounds in English like pastry and, with the help of a little "e", it easily turns into pie.

Though never a great ace in math, I'm all for celebrating such a meaningful holiday.

No spring in sight!

Here in Maine we still have one snowstorm ("Nor'easter") chasing the other. Therefore, only a cozy comfort-food-pie would do. (My husband's provocative suggestion, Cherry Pie, faced an instant rebuttal).

But Coconut Cream Pie met with wholehearted enthusiasm from all sides.

The custard filling takes a little effort, but it is soooo worth it! Cook's Illustrated's classic is by far the best Coconut Cream Pie we ever had. Highly satisfying, but not so rich that you feel stuffed for the whole day.

In fact, we had to pull ourselves together not to devour the whole thing!

The animal crackers in the crust don't contain a lot of fat or sugar. Graham crackers are a possible substitute, but don't use richer cookies. I reduced the amount of sugar in the filling by 25% - the pie is sweet enough.

Since we are empty-nesters, I made two small pies (with 2/3 of the recipe amount) in 6-inch/15-cm ø aluminum foil pans. If you take those thin-walled pans, you have to place them on a baking sheet to avoid over-browning.

The best Coconut Cream Pie we ever had!


COCONUT CREAM PIE  (adapted from Cook's Illustrated)

(One 9-inch/23-cm pie or three small (6-inch/15-cm) pies)

Crust
170 g animal crackers (or graham crackers)
12 g/2 tbsp unsweetened shredded coconut
13 g/1 tbsp sugar
57 g unsalted butter, melted and cooled

Filling
1 (13 1/2-oz) can/404 g coconut milk
246 g/1 cup whole milk
51 g/½ cup unsweetened shredded coconut
75 g sugar, plus
12 g/1 tbsp sugar
⅜ tsp table salt
85 g/5 egg yolks
42 g cornstarch
28 g unsalted butter, cut into 2 pieces
1 tsp vanilla extract

Whipped Cream Topping
357 g/1 ½ cups heavy cream (cold)
24 g/2 tbsp sugar
½ tsp vanilla extract
6 g/1 tbsp unsweetened shredded coconut, toasted golden brown
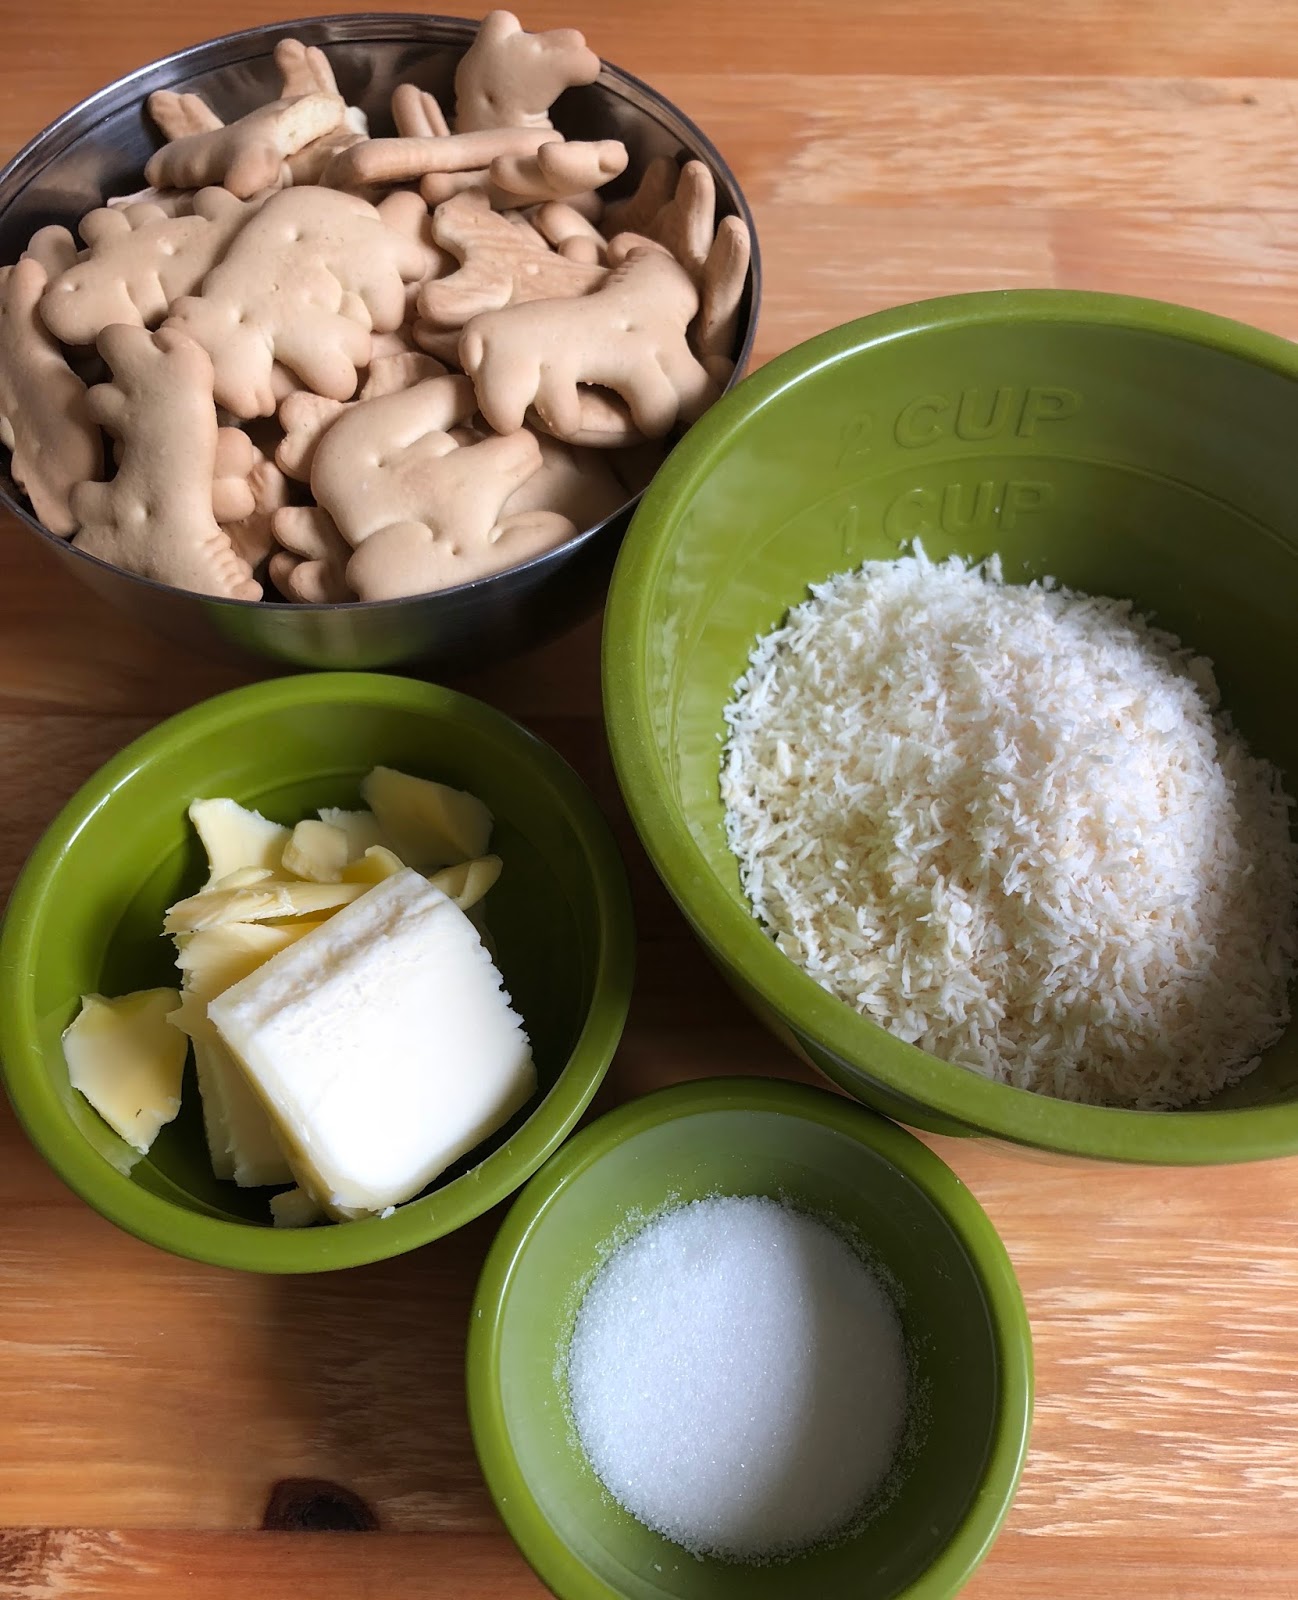
Kekse, Kokosraspel, Butter und Zucker für die Piekruste

Preheat oven to 325ºF/160ºC, adjusting rack to lower middle position.

In food processor, pulse animal crackers, coconut and sugar until finely ground. Transfer to medium bowl, add melted butter and stir well, until all crumbs are evenly moistened.

Stir melted butter into crumbs until no dry spots remain

Transfer crumbs to a 9-inch/23-cm ø Pyrex pie pan (or 3 small 6-inch/15-cm aluminum pans). Using a measuring cup or small ramekin, press crumbs evenly into bottom and up sides.


Press crumbs evenly into bottom and up sides of the pie pan

Place pie pan(s) in the oven (put aluminum pans on a baking sheet!) and bake for about 15 minutes, rotating pie(s) halfway through, until crust is fragrant and medium brown.

Let crust(s) cool on a wire rack (about 30 minutes).

Coconut milk mixture

For the filling, bring coconut milk, whole milk, coconut, 75 g sugar, and salt to a simmer over medium-high heat, stirring now and then.

Mix egg yolks with cornstarch and sugar

In a medium bowl, whisk egg yolks with cornstarch and remaining 1 tbsp sugar until well combined.

Whisking constantly, gradually pour 1 cup hot milk mixture over yolk mixture until blended. Gradually whisk in remaining milk mixture in 3-4 additions until well combined.

Egg yolk/milk mixture

Return egg yolk/milk mixture to sauce pan, and cook, whisking constantly, until it thickens and comes to a boil, about 1 minute. (To determine whether a full boil is reached, stop stirring; you should see large bubbles bursting on the surface.)

Off the heat, whisk in butter and vanilla

Remove pot from heat, and whisk in butter pieces and vanilla until butter is melted and fully incorporated.

Pour filling into crust...

Pour hot filling into cooled pie crust(s), smoothing surface with rubber spatula. Press a pieces of plastic wrap directly against surface (to prevent a skin from forming).

...then cover with plastic foil, pressed directly on surface

 Refrigerate pie(s) until firm, at least 3 hours or overnight.

Spread topping over the pie, then sprinkle it with toasted coconut

Just before serving, whip heavy cream with sugar and vanilla, using handheld mixer, until soft peaks form, 1 1/2 bis 2 minutes. Spread topping over pie filling. Sprinkle with toasted coconut.

Coconut Cream Pie

TIP: Pie leftovers keeps, covered, for 2-3 days in the fridge. If you bake several small pies, like I did, add topping to each pie just before serving.

Sunday, November 11, 2012

SOUR CHERRY PIE - BIRTHDAY CAKE FOR MY LOVE


Hier geht's zur deutschen Version dieses Posts


When I asked the best of all husbands what kind of cake he would like for his birthday I was pretty sure that he would wish Sachertorte, as usual (he always orders Wiener Schnitzel when we are in Germany, too.) But with an impish grin he retorted: "SOUR CHERRY PIE!".

In principle there's nothing wrong with that - I love pies - but this is a hot button issue in this house. My late mother-in-law was an excellent cook, and, although, like me, an American by marriage only, she mastered this Anglo-American pastry to perfection.

My first trials at making a pie crust ended the same way as my first efforts to bake muffins. As a German used to mix the heck out of cake batters so that no loose flour or (shudder!) lumps of butter remain, my muffins resembled mini pound cakes and my pie bottoms short crust.

Confronted with my first creation, after slaving away for hours in the kitchen, the love of my life uttered the fateful words: "It's not bad, but not quite right, it's not like my mother's. Her sour cherry pie is Thee Best!"

I swore to myself to do better. At my next trial my crust turned out a little flakier, and I wasn't covered in sweat quite as much, but:

"It's not like my mother's - her crust is really flaky!"

After diligently studying numerous baking books and food magazines I finally managed to produce a buttery pie crust that was neither tough, nor too brittle, and didn't get damaged in transition to the pie pan.

"Not bad," conceded my spouse - but somehow the cherry filling of his mother tasted better! That was the last straw - I'd had it. I swore I would never bake another cherry pie as long as stark ingratitude and unflattering comparisons could be expected in this household.

Not that I didn't try to pry the secret of her cherry pie from my wily Venetian mother-in-law when she was still alive. But she eluded easily all sneaky trials to find out, and direct frontal attacks she parried by claiming old age and forgetfulness.

But birthday is birthday, after all, and I had rashly promised the best of all husbands to fulfill his cake wish (are pies really cakes?)

Every baker knows that too much water makes a pie crust tough, but a drier dough is brittle and difficult to work with. Thanks to Cook's Illustrated's scientific approach, this was no longer a problem for me. Unlike water, the alcohol in their Basic Pie Crust with Vodka has the ability to moisten the dough without encouraging gluten development. (Don't worry, you won't taste the vodka.)

I like my pie crusts a little heartier, and exchange a quarter of the white flour with whole wheat or spelt, or, sometimes, substitute 2 tablespoons of flour with nutmeal.

Unfortunately, fresh sour cherries are hard to find in Maine - my own harvest was still a bit too meager this year. Therefore I use lightly sweetened Morello cherries from a glass.

Our little sour cherry tree had 5 cherries this year!
For the filling I adapted a recipe from William-Sonoma "Pie & Tart", but reduced the sugar content and added some lemon zest.

The pie has a decorative lattice top that is easier to make than it looks. Here you find instructions on how to weave it.

You can prepare the crust using a food processor or stand mixer. But keep in mind: for the food processor the fats have to be ice cold, but for the stand mixer fat at room temperature works best.

Weaving a lattice crust is easier than you think

PIE CRUST WITH VODKA
355 g (2 1/2 cups) all-purpose flour (I exchanged 2 tablespoons flour with toasted almond meal.)
1/2 tsp. salt
2 tbsp. sugar
170 g (1 1/2 sticks) cold*) butter, cut in 1/2 cm/1/4" slices
  80 g (1/2 cup) cold*) vegetable shortening, cut in 4 pieces
  1/4 cup/60 ml cold vodka (required, don't substitute)
  1/4 cup/60 ml cold water

*) if you use a mixer instead of a food processors, the fats have to be at room temperature!

CHERRY FILLING
65 g sugar
2 tbsp. corn or potato starch
1 pinch salt
750 g pitted sour cherries (glass), drained (reserve 40 ml of the liquid)
1 tsp. vanilla extract
1/2-1 tsp. lemon zest

Instructions for food processor: 
Briefly pulse 200 g (1 1/2 cups) of the flour with salt and sugar. Add butter and shortening, and process, until uneven clumps (like cottage cheese curds) start to form, and all flour is coated. Scrape bowl with rubber spatula and redistribute dough evenly.

Add remaining flour and pulse 4 - 6 times, until mixture is evenly distributed around bowl and has been broken up. Empty mixture into medium bowl.

Instructions for stand mixer:
(Butter and shortening have to be at room temperature.) Briefly mix 2/3 of the flour, salt and sugar at medium-low speed, until combined. Add butter and shortening and mix just until dough forms rough ball around paddle.

Scrape bowl with rubber spatula, and add remaining flour. Mix very briefly at medium-high speed, until dough has just broken up in smaller pieces. Transfer to medium bowl.

Sprinkle vodka and water over mixture. With rubber spatula, use folding motion to mix, pressing down on mixture until dough is slightly tacky and sticks together.

Divide dough into 2 equal balls and flatten each into 4-inch/10 cm disk. Cover each with plastic wrap and refrigerate at least 45 minutes (or up to 2 days.)

Remove 1 disk from refrigerator and roll out on generously floured work surface to 12-inch/30 cm circle about 1/8-inch/3 mm thick.

Roll dough loosely around rolling pin and unroll into pie plate, leaving at least 1-inch/2.5 cm overhang. Ease dough into plate by gently lifting edge of dough, while pressing into plate bottom with other hand. Refrigerate until dough is firm, ca. 30 minutes (or freeze for 15 minutes.)

For the filling, stir together sugar, starch and salt in a small bowl. Place drained cherries in large bowl. Sprinkle with sugar/starch mixture, and toss around until evenly distributed around cherries.

Add vanilla and reserved cherry juice, stir until well combined. Immediately spoon filling into pie crust, and top with butter pieces. Place in refrigerator.

For the lattice crust roll out second piece of dough in the same way to 12-inch/30 cm circle. Using pizza roller or sharp knife, cut into 16 stripes (1 1/2-inch/2 cm wide). (See here for instructions.)

Place one half of the stripes horizontally across cherry filling (starting with long stripe in the middle).  Fold the 2., 4., 6. and 8. stripe in the middle, and over to the left side. Then place a long stripe vertically in the middle of the pie, (across stripes that are not folded over.) Unfold stripes back, so that they lay over the vertical stripe.

Fold over 1., 3., 5. and 7. stripe to the left. Place another stripe vertically on filling. Unfold stripes back, so that they lay over vertical stripe.

Continue weaving this way, until half of the pie is covered. Then start weaving the other side, folding every other stripe to the right. When the lattice crust is done, shorten overhanging stripes, until the are level with rim of the pie pan.

Put rimmed baking sheet, upside down, in lowest position, and preheat oven to 425ºF/220º C.

Place pie on hot baking sheet and bake for 15 minutes. Reduce temperature to 350ºF/180ºC  and continue baking for 40 - 50 minutes, until crust is deep golden brown, and filling is bubbling at the rims.

Let pie cool on wire rack.

TIP: To warm up pie, bake for ca. 10 minutes in preheated oven at 350ºF/180ºC. You can also freeze the pie, wrapped in plastic foil, in a zipLock bag.


Cherry Pie - fresh from the oven

Thursday, August 2, 2012

APRICOT-PLUM GALETTE - A CURE FOR "PIE ANXIETY"

Apricot-Plum Galette, juicy and tangy
Apricot-Plum Galette, a fruity, tangy dessert, was our Avid Bakers' Challenge for August. It came just right for these hot summer days.

Abigail Dodge, author of "The Weekend Baker", calls a galette the "friendliest of all pies": ideal for people suffering from "pie anxiety". There is no double crust to deal with, no complicated lattice weaving, no edge crimping - not even a pie plate is needed.

Though I like the combination of plums and apricots - and both were available  in our supermarket - I didn't suffer so much from pie phobia, as from filling anxiety. Apricots and plums are usually only half ripe when you get them, and you never know whether they will soften into juicy goodness or mealy sourness. 

I bought my two pounds of fruit, and placed them, together with an apple, in a brown bag, hoping they would ripen in time for the challenge. 

Making the crust was no problem. Following Hanaâ's advice, I froze the cubed butter, instead of just refrigerating it. I substituted a fifth all-purpose flour for spelt flour, to have a little bit of whole grains in the crust.

Rolling the dough, transferring it into the sheet pan - no great challenge there, and no slightest twinge of pie anxiety. 

After their three days of hobnobbing with the apple, I found the apricots and plums softer and sufficiently sweet, so I didn't add any additional sugar. I forgot the lemon juice in the mix, so I belatedly drizzled a bit over the top.

The galette looked very appetizing when it came out of the oven - only the crust had cracked in several places and the pie sat in a puddle of juice!

And then came the only glitch - Abby Dodge wants you to lift the slightly cooled galette with two spatulas on a plate. This action, exercised with a metal peel and a bench knife, ended in a broken pie. 

The congealing juice stuck to the parchment paper, and the sticky surface made easy gliding impossible. The parchment paper was pushed together in wrinkles, and the galette broke apart.

Re-assembled galette, the damage is hardly visible

 I got the pie out, don't ask me how, and assembled the broken pieces on the plate, so that the galette looked almost like new. I didn't attempt to glaze it, not wanting to disturb my poor pie anymore.

But, in the end, who cares, when the the taste is right. And it WAS right! Plums, apricots and ginger made an awesome combination, and the crust was delicate and flaky. 

You'll find the recipe in "The Weekend Baker", by Abigail Johnson Dodge. She calls her recipes "irresistible" and I wholeheartedly agree. And to make this galette entirely "stress-free for busy people", I would next time line the baking sheet with aluminum foil, and move it with the pie to the platter.

And, after reading other Avid Bakers' posts, I realize that leakages rather seem to be the rule in rustic galettes, not a failure. Even master baker Joanne Chang commented in Fine Cooking: "It’s all right if some of the juices escape from the tart and seep onto the pan." 

But I still thought about how to minimize those leaks, and asked my knowledgeable daughter Valerie  what she would do.
It's great to have a chef in the family
She recommended "Bakers' Secret Weapon" - a layer of cake crumbs on the crust to soak up excess juice. Or mix the fruits with the sugar several hours before using, strain them over a bowl, and then cook the juice in a sauce pan until reduced to syrup. 

Another way to achieve a leak free crust is a French pastry bakers' technique, called fraisage. After transferring the dough to the work surface, you smear the crumbly mass repeatedly with the heel of your hand, until it is cohesive. Cook's Illustrated explains that this procedure creates long, thin streaks of butter between layers of flour and water, resulting in a sturdy, but very flaky dough.

If you would like to join the Hanaâ's Avid Bakers, take up the monthly challenge, and have the fun - here is your link: