Showing posts with label German Brötchen. Show all posts

Monday, June 24, 2013

BAUERNBRÖTCHEN - RUSTIC ROLLS WITH OLD DOUGH

Hier geht's zur deutschen Version dieses Posts (folgt noch)

Gerd Kellner, aka Ketex, is not only an accomplished baker, but, also, writes one of Germany's best bread baking blogs. A book with his recipes: "Rustikale Brote aus deutschen Landen" is available as e-book for Kindle.

When I saw his post on Bauernbrötchen, I wasn't only attracted by the attractive look of these rustic rolls, but, also, intrigued by his use of old dough as leaven.

"Old dough" in bakers' lingo means a piece of dough, cut off before shaping the bread, and kept in the refrigerator for later use. After I learned how to make a wild yeast starter, and bake my first bread from a French cookbook, I had always saved a portion of the dough for my next loaf. 

Advancing from a series of weapon grade, dense and chewy "bricks" to more edible breads, this method had worked very well for me, until I branched out and started baking other types of bread than just my everyday German Feinbrot.

My typical German Feinbrot was originally made with old dough

The old dough was replaced by a whole wheat mother starter, and all but forgotten as a viable rising agent.

With Ketex' beautiful Bauernbrötchen in mind, I reserved a piece of dough from a yeast bread I made, and put it for later use in my basement refrigerator - and then completely forgot about it! 

About 3 months later, when I was looking for something in the depth of the fridge, I came upon the little container, and remembered what it was. 

I opened it gingerly, expecting nothing good after all the time, and the old dough, indeed, looked, shall we say, "antique", and didn't smell very nice, either. At least there was no mold on it! 

Lovely Rose Hip Levain - made from accidentally fermenting jam!

Always curious, and open for experiments before I throw something in the trash, I just wanted to see whether there was any life left in the mummified relic, and proceeded with the recipe.

Though I was rather suspicious about how this might affect the taste, my distrust was unfounded, the rolls, though not looking as nice as Gerd's, rose well and tasted surprisingly good. And I had a new, interesting formula to work with. 

For my second bake I did just the opposite: my old dough had slumbered only for 3 days in the fridge. With my first batch of Bauernbrötchen, I had followed Ketex recipe to the t, using a poolish as preferment and adding the piece of preserved dough later to the final mixture.

Rather than preparing an extra poolish, I refreshed the old dough

I didn't quite see the rationale for an additional poolish, especially since the dough was to be retarded in the refrigerator overnight. Why not, instead, feeding the old dough up front, and let it act the part of the poolish?

And, since the percentage of rye flour in the dough was not so high that a change would influence the crumb, I used whole rye instead of medium rye (easy to come by in Germany, but, alas, not readily available in the US.) 

Rather than kneading the dough for 15 minutes, and folding it only once, I followed Peter Reinhart's procedure in "Artisan Bread Every Day" (my default S&F) with a brief mix, an autolyse, and 4 stretches and folds over a period of 40 minutes.
 
Gram measuring spoon, for weighing very small amounts

Ketex adds a tad of yeast to his dough. For these very small amounts (that, nevertheless, make the rising time more predictable) you need a special scale, able to accurately weigh a few grams.  Mine looks like a big spoon, and is easy to use (about $15 at Amazon)

The second batch, without the poolish, performed just the same, but tasted a bit heartier with the whole rye. I had to adjust the baking temperature and time, but every oven is different, and you have to adapt to this, anyway. 

We found these crusty rustic rolls great for open faced sandwiches, and they, toast well, tool. You can easily freeze them, therefore it's worth it to make a double batch.

But don't forget to save a piece of the dough: for your next Bauernbrötchen!


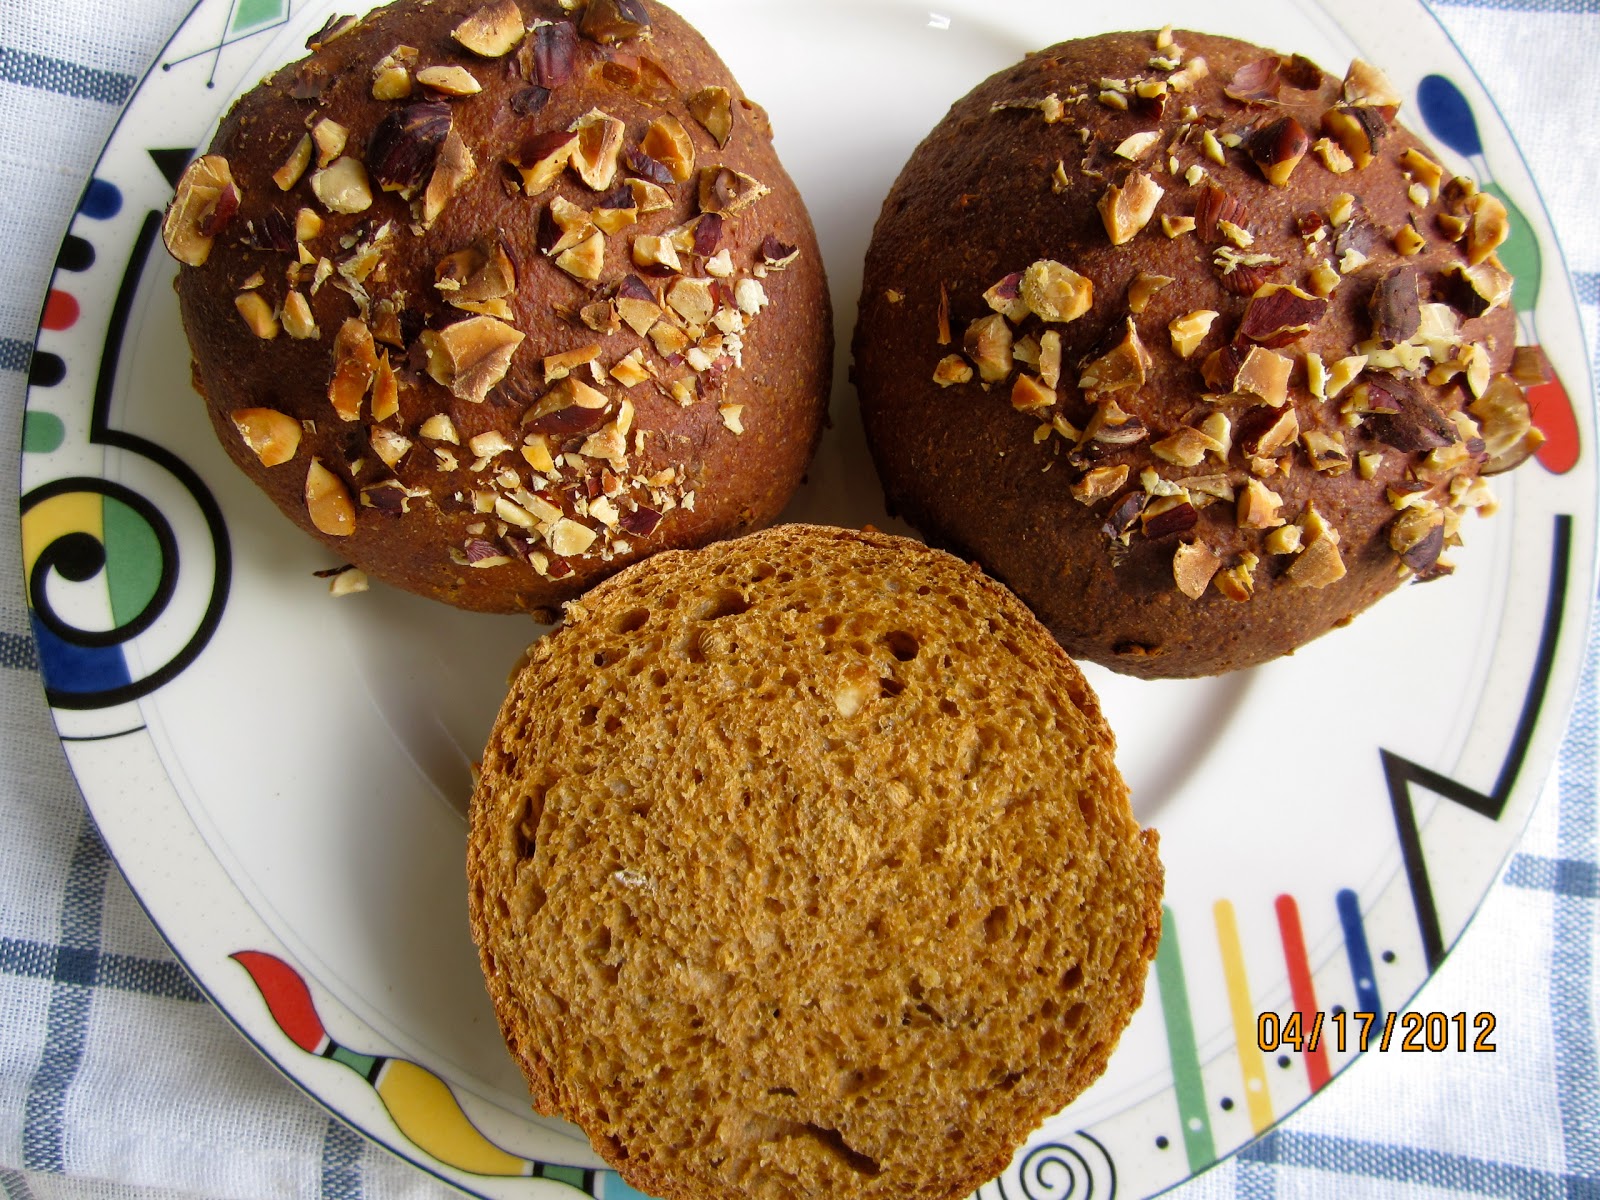
These rolls were my very first batch, made with pretty ancient dough


BAUERNBRÖTCHEN WITH OLD DOUGH  (adapted from Gerhard Kellner/Ketex)

OLD DOUGH
100 g/3.5 oz old dough
    5 g/1 tbsp whole rye flour
  42 g/3 tbsp water

FINAL DOUGH
147 g/5.2 oz refreshed old dough (all)
400 g/14.1 oz bread flour
  45 g/1.6 oz whole rye flour
258 g/9.1 oz water
    8 g/0.3 oz olive oil
  10 g/0.4 oz salt
 1.8 g/0.06 oz instant yeast (or 5 g fresh yeast)
 3.5 g/1 1/2 tsp barley malt
 rye flour for sprinkling


Rejuvenated old dough

DAY 1:
In the morning, feed old dough with rye flour and water. Cover, and leave at room temperature until lively and bubbly (like poolish.)

In the evening, mix final dough ingredients at low speed (or with wooden spoon) until all flour is hydrated, 1 - 2 minutes. Let dough rest 5 minutes. Then knead at medium-low speed (or by hand) for 2 minutes, adjusting with a little more water or flour if necessary (dough should be a bit sticky.) Continue kneading for another 4 minutes. Dough should be still more sticky than tacky.

Ready for S & F (use oiled or wet hands and work surface

Transfer dough to lightly oiled or wet work surface. With oiled or wet hands, pull and stretch it into a rough square. Fold dough from top and bottom in thirds, like a business letter. Then do the same from both sides. Gather dough together in a ball, and place it, seamside down, in a lightly oiled bowl. Cover, and let it rest for 10 minutes.

Repeat this stretching and folding 3 more times, at 10 minute intervals. After the last fold, reserve 100 g/3.5 oz of the dough (for the next "old dough".) Refrigerate reserved piece (container with lid.) (Ketex recommends using it within 10 days, but it keeps longer.

Place remaining dough also in an oiled container with lid, and refrigerate it overnight.
 
Place dough in a container with lid and refrigerate it overnight

DAY 2:
(Since these are small pieces, you can shape them cold.)

Divide dough into 8 pieces (à 100 g/3.5 oz) and shape them into balls. Let them relax for 20 minutes, then roll them into strands with pointed ends. 

The dough pieces are first shaped into rolls

Place rolls in a couche, seam side up. Sprinkle with rye flour. Cover, and let proof for 1 - 2 hours. (Preheat oven 45 minutes before baking.)

Preheat oven to 500ºF, including steam pan. 

Bauernbrötchen proofing on a couche

Place Bauernbrötchen, seam side down, on perforated or parchment lined baking sheet, sprinkle them with whole rye flour, and score lengthwise.

Bake rolls for about 20 - 25 minutes at 450ºF, steaming with a cup of boiling water. (Rotate the baking sheet 180 degrees after half the baking time, and remove the steam pan). They should be golden brown. For a crispier crust, leave them for 5 more minutes in the switched-off oven, with the door slightly ajar.

Golden brown and appetizing!

Submitted to YeastSpotting


Submitted to Panissimo:  Bread & Companatico
                                          Indovina chi viene a cena                                            

Sunday, June 3, 2012

MUESLI ROLLS

Muesli Rolls
 Hier geht's zur deutschen Version dieses Posts


A while ago I admitted neglecting some of my baking books, never giving them a second look, while shamelessly favoring others.

To atone for my neglect, I pledged to give every book a fair chance with my "Equal Opportunity Baking" list, with one recipe from ALL of my baking books.

Published in 1997, I use "Brot und Kleingebäck" mainly as resource, adapting the old, labor intensive methods to more modern techniques that require less brawn and hands-on work, thanks to longer fermentation and refrigerator sleepovers.

Interesting recipes but old techniques
These little (or no)-knead methods, described by Peter Reinhart, Jim Lahey, and others, are much easier to work with. And not only that, they also improve the taste.

I started the evening before, kneading the dough, then let it slowly rise overnight in the fridge. The next morning I baked my rolls. When they came out of the oven, they looked - and smelled - very appetizing.

I couldn't wait to have my first bite, but what a disappointment - I found that "the proof was in the Muesli Rolls". They tasted good, yes, but were much too dry!

How could that happen? My dough had been well hydrated the night before, even a little bit sticky, as it should be with stretch-and-fold doughs.

I really liked the taste of the rolls, otherwise I would have written off the recipe with a scribbled comment: "not that great!" Therefore, I took on the recipe again to find out what had caused this lack of moisture.

Was it the different fat content of German "saure Sahne" and American sour cream (10% vs 12-16%?) Not likely: more fat will make the crumb softer, but not drier.

Saure Sahne or sour cream - here it didn't matter
American molasses instead of German sugar beet syrup? Nope! And my baking friend Paul only recommend adding more water, when I asked for his advice.

But there was one ingredient that had puzzled me from the beginning - the unspecified "hearty muesli mix". There are many muesli mixes on the market, and they differ in their composition from one brand to the other.

I looked at the list of ingredients on the package. Bob's Red Mill's "Old Country Style Muesli" had 5 different flakes, dates, raisins, flax seed, sunflower seeds, almonds, and walnuts.

The stretch-and-fold method doesn't require pre-doughs (except for sourdough breads, of course). Usually the whole grains and seeds have enough time to soak when they spend the night in the fridge.

But I find that pre-soaking coarser ingredients doesn't hurt. And whole flax seed I always soak for 24 hours, anyway - to make them better digestible.

This is the culprit!
Even though my dough seemed well hydrated after the stretch-and-fold procedure, those flakes, seeds and dried fruits had swallowed a lot of water overnight.

The original recipe mentions overnight refrigeration as a do-ahead option, too, but without the muesli mixture. That should be kneaded into the dough before baking.

With just 10 minutes (!) rising time for the shaped rolls, the flakes and dried fruits have no time to absorb much liquid, and the original recipe requires - except for the sour cream - only 5-6 tablespoons water!

But what to do? I like chewing on nuts, yes, but on hard pieces of dried fruit? No, thanks!

In a comment, the recipe suggests using a mixture of oatmeal, raisins and hazelnuts, instead of store bought muesli. And that's exactly what I did when I made the rolls again - to have better control over the hydration.

Since a ready muesli mixture also contains sugar, I added a bit of honey. These whole wheat rolls should be slightly sweet.

I hoped these tweaks would work, and I wasn't disappointed - the second batch of muesli rolls turned out just as nice as they looked!


MUESLI ROLLS  (10 - 12))

Soaker
65 g old fashioned rolled oats
20 g golden raisins
100 g water

Dough:
400 g whole wheat flour
185 g soaker (all)
250 g sour cream or Greek yogurt, lukewarm
12 g instant yeast
45 g/2 tbsp molasses
10 g honey (or more, to taste)
1 large egg
6 g salt
5 crushed coriander seeds
½ tsp ground cinnamon
20 g toasted hazelnuts, coarsely chopped
egg white, mixed with a bit water (for glazing)
20 g hazelnuts, finely chopped (for topping)

The homemade muesli mix worked!

DAY 1:
In the morning, stir together all soaker ingredients. Cover, and leave at room temperature.

In the evening, mix together with all dough ingredients at low speed (or with wooden spoon), until all flour is hydrated, and rough ball forms. Let dough rest for 5 minutes.

Knead at medium-low speed (or with hand) for 2 minutes, adjusting with a little more water, if needed. (Dough should be somewhat sticky.) Resume kneading for another 4 minutes. (Dough should still be a bit sticky.)

Transfer dough to a lightly wet or oiled work surface. With wet or oiled hands, stretch or pat dough into a rough square. Fold like business letter in 3 parts, then repeat the same folds from the left and right side.

Pick up dough ball, gathering edges underneath, and place, seam side down in lightly oiled bowl. Cover, and let rest for 10 minutes. Repeat this stretching and folding 3 times more, at 10 minute intervals. After the last fold, place dough in oiled bowl or container, cover, and refrigerate overnight.

Ready for baking

DAY 2:
Divide cold dough*) into 10 - 12 equal pieces. Shape rolls, or torpedoes, and place them, smooth side up, on parchment lined baking sheet (I like using a perforated baking sheet). Place hazelnut pieces for topping on a plate.

Brush rolls with egg wash, and dip in hazelnuts. Gently press nuts down, so that they stick. Let proof 45 - 60 minutes, or until rolls have grown 1 1/2 times their original size, and a dimple, poked with your finger, doesn't fill up again.

Preheat oven to 400ºF/200ºC. Bake rolls for 12 minutes, rotate 180 degrees, and continue baking for about 13 minutes more, until they are deep golden brown.

Let rolls cool on wire rack.

*)  With rolls it is not necessary to let them come to room temperature before shaping. They warm up fast.


 Submitted to Yeast Spotting

Updated 12/28/13

Tuesday, June 22, 2010

WEIZENBRÖTCHEN - GERMAN EVERYDAY ROLLS


Nobody in Germany thinks of baking regular, plain white rolls at home. You get them freshly baked everywhere, in bakeries, supermarkets, and even in gas stations.

Every German region has them, called "Rundstück" in Hamburg, "Schrippe" in Berlin, "Semmel" in Munich, or simply "Brötchen" (= little bread).

The typical Brötchen has a crackly crisp crust and a fluffy, soft, easy to pull out crumb. It has nothing in common with its soft, sweet and chewy US cousin, the dinner roll. And American Kaiser Rolls are just Kaisersemmel wannabes, they share only the pretty star cut with their Bavarian or Austrian ancestors.

Brötchen crumb should be soft, fluffy, and easy to pull out

One of the greatest woes of German expats is the total lack of this everyday staple in the US.

No Brötchen to be found anywhere - perhaps bad imitations, but never the real thing.

And worse: no cookbook would even list a recipe!

In those days I had no clue about the differences between European and American flours.

I only knew they were categorized in a different way, European flours by their ash content (meaning what is left if you burn it) and American ones by their protein level.

One day we were shopping at our favorite Italian grocery, Micucci, in Portland. I saw Italian flour Tipo 00 on their shelves, and bought it, more out of curiosity then anything else. I remembered it listed as an ingredient in one of my most favorite bread baking books from a bakery in South Tyrol, Italy.
Different toppings to choose from

In Ploner's "Brot aus Südtirol" I had finally found a recipe for Brötchen. I tried them several times, just assuming "Tipo 00" would be the same as all-purpose flour.

Frustratingly, every time the rolls turned out lean and chewy, more reminiscent of French bread.

But when I used the Italian flour, I finally nailed it: my rolls had the soft, fluffy, "pull-out" crumb typical for Brötchen.

Wikipedia told me why: US wheat has much more protein compared with European wheat.

Protein rich flour develops a strong gluten structure, so that the crumb is airy and chewy. Soft, low protein flours, like German Typ 405, or Italian Tipo 00, have much less gluten and bake into breads with a denser, fluffier crumb.

For an American/European flour "translation", click here.

I like a crunchy seed topping (as shown in the photos), but you can also give your rolls or a simple shiny, crackly glaze, so that they look like Rundstücke.


WEIZENBRÖTCHEN    (adapted from Richard Ploner: "Brot aus Südtirol")
 (12 rolls):

Dough
500 g/17.6 oz Italian Tipo 00 or pastry flour
8 g/0.3 oz instant yeast
4 g/1 tsp. sugar
270 g/9.1 oz water, lukewarm
40 g/1.4 oz olive oil
10 g/0.4 oz salt

Seed Topping
1 egg, slightly beaten, for brushing
sesame, poppy or sunflower seeds, for topping

OR

Shiny, Crackly Glaze
 2 g cornstarch, boiled in
100 g water, and cooled to room temperature 


DAY 1
In the evening, stir yeast into lukewarm water until dissolved. Mix all ingredients for 1 minute at lowest speed (mixer or wooden spoon). Let dough sit for 5 minutes.

Knead on medium-low speed (or with hands) for 2 minutes. Dough should be supple and still a little bit sticky (adjust with water if needed). Continue kneading for 4 more minutes, increasing speed to medium-high for last 30 sec. Dough should be very tacky, bordering on sticky.

Fold the dough like a business letter in thirds

Transfer dough to lightly floured work surface. With wet or oiled hands, stretch and fold dough like a business envelope in thirds, then turn it around 90 degrees, and fold from short sides the same way.

Gather dough ball, sides tucked underneath, and place it in lightly oiled bowl. Cover, and let rest for 10 minutes. Repeat these stretches and folds 3 more times, every 10 minutes (40 min. total time)*.

Place dough in oiled bowl or container with lid (I divide it at this point in halves, and use 1-qt plastic containers). Roll dough around to coat all over with oil. Cover with plastic wrap or lid, and place in the fridge overnight.

*This technique is described in detail in Peter Reinhart's "Artisan Bread Every Day".

The dough is full of gas bubbles and has doubled

DAY 2:
Remove dough from refrigerator 3 hours before baking, to de-chill and double their original size. Prepare egg wash and three bowls with sesame, poppy and sunflower seeds for topping. Line baking sheet with parchment paper.

Shape dough into 12 little rolls.

Divide dough into 12 equal pieces, and shape them into rolls. Brush each with egg wash, then dip in seeds. If you prefer a shiny, crackly crust, skip egg wash (apply cornstarch glaze after proofing.)

Place dough balls seam side down on baking sheet. Let rolls rise ca 2 - 2 1/4 hours, or until grown 2 times their original size (remember to preheat oven after 1 3/4 hours.)

Ready for the oven

Preheat oven to 428º F/220º C, including steam pan.

Brush proofed rolls with cornstarch glaze (if using). Place rolls in oven, pouring 1 cup boiling water in steam pan.

Bake for 9 minutes, then re-brush with cornstarch glaze (if using), rotate baking sheet 180 degrees for even browning, and continue baking for another 9 - 10 minutes, or until golden brown (internal temperature at least 200º F/92º C).

Leave rolls in switched off oven for 10 minutes more (leave door a crack open), before taking them out to cool on a rack.

BreadStorm users (also the free version) can download the formula:

Freerk of BreadLab made a very nice video clip of how to make these rolls - view it at YouTube.

And check out Joanna's Brötchen post at Zeb Bakes, one of my favorite blogs with great breads and lovely photos. 

Ian, from Mookie Loves Bread made the rolls with fruit yeast water and a toasted onion, black sesame, Asiago cheese and flaxseed topping.